
Open the hood of your car in a parking lot and watch what happens. A few people will walk past without a second glance. But now and then, someone will stop, look in, and say something like, “Wow, that engine is clean.”
That reaction is not about vanity. A clean engine bay tells a story about how a vehicle has been maintained, and it says something genuinely positive about the person behind the wheel.
Here is the part that surprises most people: cleaning your engine bay is not nearly as risky or complicated as it sounds. A lot of drivers avoid it entirely because they are afraid of damaging something electrical, cracking a sensor, or voiding a warranty.
Those concerns are legitimate if you go in without a plan, but with the right approach, cleaning your engine is one of the most satisfying and practically useful things you can do for your vehicle. A clean engine bay is easier to inspect. Leaks show up immediately on clean surfaces instead of hiding under layers of grime.
Rubber hoses and belts are easier to examine. Electrical connectors are visible and accessible. When your mechanic opens the hood, they can do their job faster and more accurately, which saves you time and money. When you are doing your own maintenance, you can actually see what you are touching.
Beyond the practical benefits, there is a real pride element here. Whether you drive a 2020 Dodge Challenger R/T Scat Pack or a 2013 Honda CR-V EX-L, a clean engine bay makes your car feel cared for from the inside out. It adds to resale value, impresses during inspections, and makes routine under-hood checks something you actually look forward to doing.
This guide covers ten of the best methods for cleaning your engine bay safely, without damaging sensors, wiring, or seals. Work through them carefully, and your engine bay will look better than it has in years.

1. Cool the Engine Down Completely Before You Touch Anything
Before any product gets sprayed, any brush gets picked up, or any cover gets removed, there is one step that absolutely cannot be skipped: letting the engine cool down fully. It sounds obvious when stated plainly, but countless engine bay cleaning attempts go wrong because the driver finishes a drive, opens the hood, and starts spraying immediately.
Thermal shock from cold water or degreaser hitting a hot exhaust manifold, aluminum components, or plastic covers is a genuine risk, and it is entirely avoidable.
Hot metal expands and becomes more vulnerable to stress fractures when suddenly exposed to cold liquid. Plastic components that are hot and slightly pliable become brittle and prone to cracking under sudden temperature change.
Rubber hoses that are at operating temperature can react poorly to solvent-based degreasers applied while heat is still present. Electrical connectors, which are made from thermoplastic materials, are more fragile when hot than when cool. Each of these risks disappears when you give the engine adequate time to reach ambient temperature.
For a vehicle like the 2021 BMW 530i xDrive, where the engine bay is densely packed with sensors, vacuum lines, turbocharged components, and sophisticated plastic covers, this cool-down period is particularly non-negotiable.
BMW’s inline-six runs hot by design, and turbocharged components retain heat long after the intake manifold and valve covers have cooled. A minimum of two hours after shutdown is a reasonable guideline for most naturally aspirated engines. For turbocharged or supercharged vehicles, three to four hours is more appropriate.
Use the cool-down period productively. Gather your materials, set up your workspace, cover any nearby painted surfaces you want to protect from overspray, and review which areas of the engine bay need the most attention. Having everything organized before you start means you can work efficiently once the hood goes up and the cleaning begins.

2. Protect Sensitive Electrical Components Before Any Water Gets Involved
Water and electricity have a famously poor relationship, and your engine bay is full of both in close proximity. Before you introduce any cleaning solution or water source to the engine bay, protecting vulnerable electrical components is the single most important preparation step you can take.
Skipping this step is how perfectly healthy vehicles end up with misfires, sensor faults, and warning lights that appear the day after what seemed like a successful cleaning session. Identify the components that need protection first. Your alternator, fuse box, battery terminals, ignition coil packs, and any exposed wiring harness connectors are the primary targets.
Depending on the vehicle, the mass airflow sensor, throttle position sensor, and crankshaft position sensor may also need attention. All of these components can handle moderate environmental moisture under normal operating conditions, but direct water spray under pressure is an entirely different matter.
Plastic bags secured with rubber bands or painter’s tape work effectively for covering the fuse box, battery terminals, and any electrical connectors that lack waterproof housings. Aluminum foil molded carefully around the alternator provides solid coverage for that particularly vulnerable component.
Specialized products like dielectric grease applied to connector mating surfaces before cleaning provide an additional layer of protection that guards against moisture intrusion for months after the cleaning session is complete.
After cleaning is finished and everything has dried, remove your protective coverings and inspect each protected component before starting the engine. Check that no water has crept under the covers, that connector seals are still properly seated, and that no electrical terminals look wet.
Starting the engine over a damp or improperly protected electrical system is the most preventable cause of post-cleaning electrical faults, and avoiding it costs nothing but a few minutes of careful preparation.
Also Read: 8 Tips for Maintaining an Active Air Suspension System

3. Select a Degreaser That Matches the Materials in Your Engine Bay
Engine compartments are built with a mixture of materials such as rubber hoses, plastic covers, aluminium housings, painted brackets, and metal fittings. Because of this variety, the cleaning product you choose must be suitable for those surfaces.
Using a degreaser that is too harsh may damage rubber seals, fade plastic covers, or leave stains on aluminium parts. Choosing the right type of degreaser protects the engine components while still removing stubborn oil and grease.
Water-based degreasers are usually the safest option for routine engine cleaning. These products are designed to break down oil and dirt without attacking delicate surfaces. Many of them can be diluted with water, which allows you to control the strength depending on how dirty the engine bay is. Light dust and mild grime respond well to a diluted mixture.
Areas with thick grease around valve covers or near the oil cap may require a slightly stronger concentration. Vehicle owners who maintain the 2019 Ford Mustang GT 5.0L V8 often encounter oil residue around valve covers and performance components.
A practical solution involves two stages. A water-based degreaser handles the general cleaning of the engine bay. After that, a stronger degreaser can be applied carefully to stubborn spots where oil buildup remains.
Reading product instructions before use is always wise. Manufacturers usually mention surfaces that require caution or areas where the cleaner should not be used. Testing the degreaser on a small hidden section before applying it widely can also prevent accidental damage. This simple step helps ensure the cleaning process leaves the engine bay spotless without harming sensitive components.

4. Use Different Brush Sizes to Reach Tight Spaces and Hidden Areas
Cleaning an engine compartment properly requires more than spraying water and wiping visible surfaces. Dirt inside the engine bay often settles in small corners, under brackets, and around hoses, where it becomes difficult to remove. Grease may harden after repeated exposure to heat, making it stick firmly to metal and plastic parts. A good set of cleaning brushes makes it much easier to loosen that buildup.
Detailing brush kits designed for automotive cleaning usually include several brush sizes. Larger brushes handle broad surfaces such as plastic engine covers or battery housings. Medium-sized brushes work well for rubber hoses, wiring looms, and surrounding brackets. Smaller detailing brushes reach narrow gaps around sensors, bolts, clamps, and electrical connectors where grime tends to collect.
Nylon bristles are generally the safest choice for engine bay cleaning. They are strong enough to remove stubborn dirt while still being gentle on rubber, plastic, and aluminium parts. Brushes made with metal bristles should be avoided for most engine components because they can scratch coated surfaces or remove protective finishes.
Drivers who regularly take the 2022 Jeep Wrangler Unlimited Rubicon 3.6L V6 off-road often discover that mud and dust find their way into nearly every corner of the engine bay. Once that dirt dries, it becomes very difficult to remove with water alone. Using a stiff nylon brush together with a mild degreaser helps break up the dried mud without damaging plastic mounts, coated brackets, or rubber boots.
Taking time to use the correct brushes can transform the cleaning result. Surfaces that once looked dull and greasy regain their original appearance, while hidden areas receive proper attention. With the right tools and a steady method, even a heavily used engine compartment can look tidy and well-maintained once again.

5. Apply Degreaser With a Low-Pressure Spray and Allow Proper Dwell Time
Flooding your engine bay with high-pressure spray the moment you open a bottle of degreaser is a reliable way to get disappointing results. Degreaser products need time to penetrate, soften, and emulsify the grease and oil deposits they are designed to remove.
Rushing the process by spraying and immediately rinsing is like washing dishes without letting the soap work. You end up with a lot of effort and a less-than-clean result. Low-pressure application is the correct technique for both safety and effectiveness.
A standard trigger spray bottle set to a wide mist pattern distributes degreaser evenly without forcing liquid into sensitive connectors or under component covers. Start from the upper sections of the bay and work downward, applying a consistent coat that wets the surface without saturating it heavily enough to run into areas you have protected.
Dwell time refers to the period between application and rinsing, during which the degreaser is actively working on the contamination. Most quality automotive degreasers specify a dwell time of three to ten minutes, depending on soil level and product concentration. Follow this guideline seriously. On heavily soiled surfaces, a second application after the first rinse will continue to break down remaining residue.
Set a timer once you finish applying the degreaser to each section. This simple habit ensures you are neither rinsing too early, before the product has worked fully, nor waiting too long, which allows the degreaser to dry and streak on warm or sun-exposed surfaces. Discipline in this step produces noticeably cleaner results with less total scrubbing effort.

6. Rinse Thoroughly Using Low-to-Medium Water Pressure Only
Rinsing the engine bay is where many people make their biggest mistake. Armed with a pressure washer at full power, they blast every surface with high-velocity water in an effort to remove loosened grime quickly. What actually happens is that high-pressure water forces its way past gaskets, connector seals, and protective covers, saturating areas that need to stay dry and creating electrical and sealing problems that were not there before the cleaning started.
Rinsing technique matters as much as pressure. Work from the top of the engine bay downward in a slow, deliberate sweeping motion, allowing water to carry grime downward and out of the bay rather than pushing it into lower components.
Spend extra time rinsing the firewall and the area around the intake, where degreaser has a tendency to pool in recesses if not thoroughly flushed. Owners of the 2016 Porsche Cayenne S 3.0T understand the importance of gentle rinsing particularly well.
Porsche’s V6 and V8 configurations pack a large number of electronic management components at accessible heights in the engine bay, and the brand’s engineering tolerances leave less margin for water intrusion at connectors than some domestic vehicles.
Owners who have followed a careful low-pressure rinse protocol consistently report clean engine bays with zero post-wash electrical issues, while those who used pressure washers at standard settings have shared cautionary forum posts about sensor faults that appeared within 24 hours of washing.
After rinsing, inspect all surfaces visually to confirm that degreaser residue has been fully removed. Pay attention to the undersides of hoses, the recesses around brackets, and the area behind the battery tray, where foam and sludge sometimes accumulate and survive a quick rinse pass. A second rinse pass over these areas takes only a minute and ensures that nothing is left behind to dry into streaks or residue on clean surfaces.

7. Dry the Engine Bay Properly Before Starting the Engine
Rinsing is not the last step. Drying is. Starting your engine over a wet engine bay introduces electrical risks, causes water to be drawn into air intake components before it evaporates, and gives moisture the opportunity to settle inside connector housings before the heat of the running engine can drive it out safely.
Proper drying before the first post-wash startup is a step that professional detailers never skip, and neither should you. Compressed air is the gold standard for engine bay drying. A can of compressed air or an air compressor with a blow gun allows you to direct pressurized air into connector housings, under hose clamps, around sensor mounts, and into any crevice where standing water could cause a problem.
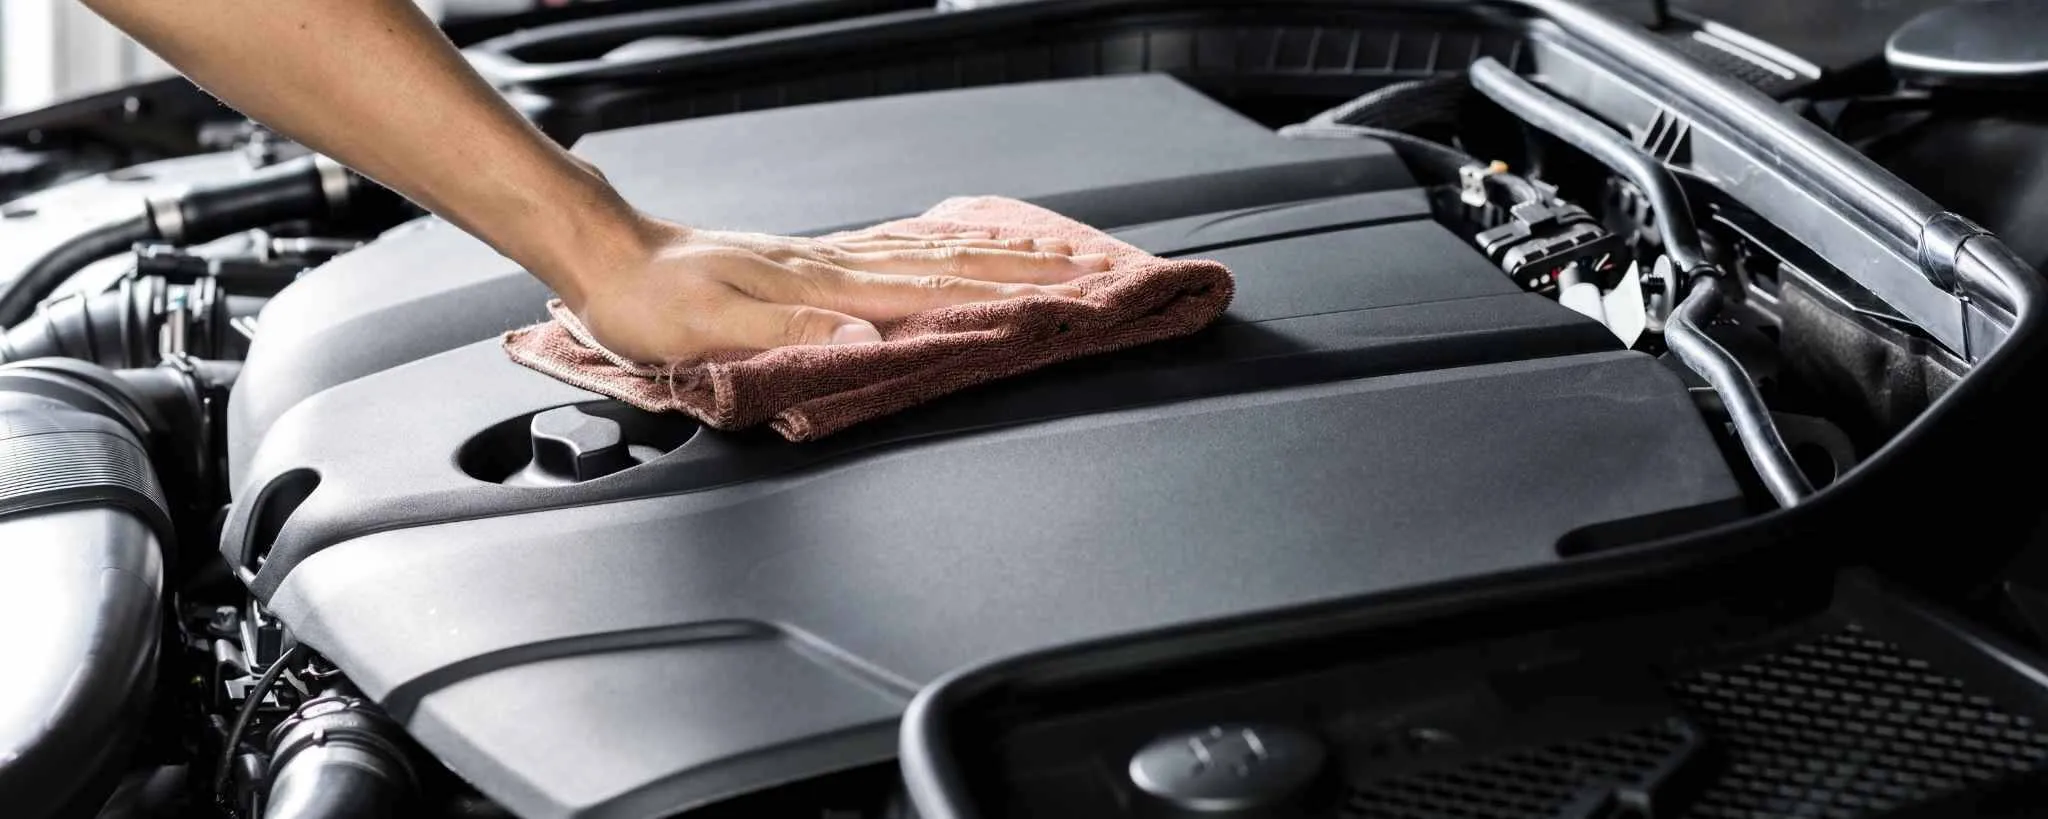
Work systematically from the rear of the bay near the firewall forward, blowing water out from between components rather than deeper into them. A clean microfiber towel works effectively for drying accessible flat surfaces like plastic covers, the top of the battery, valve cover surfaces, and large brackets.
Avoid pressing microfiber into tight spaces between hot or sharp components, as this can leave fibers behind or cause the towel to snag. For larger, flatter surfaces, a microfiber towel absorbs surface moisture more quickly and completely than waiting for air evaporation alone.
After drying, allow the engine bay to air out for an additional 15 to 20 minutes with the hood propped open before starting the engine. This brief open-air period allows any residual surface moisture to evaporate completely.
When you do start the engine, let it idle for five to ten minutes and monitor for any unusual sounds, warning lights, or hesitation that could indicate residual moisture in a sensitive component. In nearly every case where drying was performed carefully and completely, the engine starts cleanly and runs without issue from the first moment.

8. Condition and Protect Rubber Hoses, Plastic Covers, and Vinyl Parts After Cleaning
Cleaning the engine compartment can be quite satisfying. Once the dirt, oil stains, and dust have been removed, the engine begins to look much more organised and presentable. Still, maintaining that neat appearance and protecting the materials inside the engine bay requires an additional step that some vehicle owners ignore.
Rubber hoses, plastic covers, vinyl wire looms, and similar components benefit greatly from proper conditioning after the washing process. Applying a protective dressing helps maintain both the appearance and durability of these materials.
Application method plays an important role in achieving good results. Instead of spraying the dressing across the entire engine bay, it is better to apply the product with a foam pad or detailing brush. Controlled application prevents excess product from spreading onto belts, metal parts, or electrical connectors.
When dressing rubber hoses, move the applicator smoothly along the hose in a single direction. This technique gives the hose a clean and even finish without pushing product into clamp areas where it may interfere with proper sealing.
Vehicle owners who detail the engine compartment of the 2020 Lincoln Aviator Reserve 3.0T often notice how much difference proper dressing makes. That model uses several visible plastic engine covers with textured surfaces that respond well to conditioning products.
Once treated, those panels regain the deep factory appearance that gives the entire engine bay a well-cared-for look. Regular maintenance keeps the finish looking fresh. Reapplying dressing every few months or after each engine cleaning session helps preserve flexibility in rubber parts.
Choosing products that include ultraviolet protection also helps prevent fading and surface deterioration when the vehicle spends long hours under direct sunlight.

9. Clean the Underside of the Hood During Engine Bay Detailing
Opening the hood for engine cleaning creates a perfect opportunity to attend to an area that many drivers ignore completely. The underside of the hood forms part of the engine compartment, yet it often receives little attention during routine washing.
Leaving that section dirty while the rest of the engine bay looks spotless creates an uneven result that becomes obvious whenever the hood is raised. Dirt tends to gather in several forms beneath the hood. Heat from the engine gradually creates dark stains near the central area.
Dust and road particles settle along the outer edges. At the same time, vapour from engine fluids sometimes forms a thin, greasy layer on metal surfaces. Each type of residue can be handled effectively with the right cleaning method.
Begin with the areas closer to the engine where heat stains usually appear. A light application of a water-based degreaser works well here. Spray a small amount, allow it to sit briefly, then wipe the surface carefully with a microfiber cloth. This wipe-down method is usually more practical than rinsing because the hood interior contains components that are easier to clean without excess water.
The outer edges usually require less effort. Dust and grime in those sections often come off easily with a mild all-purpose cleaner or diluted interior cleaning solution. A gentle wipe removes most of the buildup. Drivers of the 2017 Acura MDX Sport Hybrid SH-AWD should pay particular attention to the hood liner when cleaning this area.
That vehicle includes a sound-absorbing foam liner beneath the hood. Cleaning the liner gently with diluted cleaner and a soft brush helps restore its appearance. Applying a suitable foam conditioner afterward helps preserve the material and maintain proper attachment.
Also Read: 10 Critical Checks Before Taking Your Car for an Emissions Test

10. Establish a Regular Cleaning Schedule to Make Each Session Easier
A clean engine bay is not a one-time achievement. It is the product of a regular habit, and like most maintenance habits, the more consistently it is practiced, the easier each session becomes. Drivers who clean their engine bay once every six months find minimal accumulation that responds to a light degreaser and a quick rinse.
Establishing a cleaning interval that matches your driving conditions is more practical than following a rigid calendar. Drivers who commute in urban environments with high road dust levels or who frequently drive on dirt roads benefit from a four-month cleaning interval.
Drivers who primarily use highway miles in clean-air environments can reasonably stretch to every six to eight months between full cleaning sessions. Track day participants and off-road drivers may want to rinse the engine bay lightly after each particularly challenging event to prevent heavy contamination from curing onto surfaces.
Keeping a basic engine bay cleaning kit in your garage makes impromptu maintenance sessions easy. A spray bottle of diluted degreaser, a set of detailing brushes, a can of compressed air, a dedicated microfiber towel, and a bottle of rubber dressing represent a complete kit that costs under $60 to assemble and stores easily in a small bin.
When quick access is available, the threshold for performing a light touch-up session drops considerably, and small accumulations never get the chance to develop into heavy buildup.
Owners of the 2022 Toyota 4Runner TRD Off-Road Premium have found this scheduled approach particularly valuable given the vehicle’s intended use. The 4Runner’s 4.0L V6 sits in a relatively open engine bay that is exposed to off-road dust, mud splash, and trail debris on vehicles used as intended.
A scheduled light cleaning after every two or three trail outings keeps the bay in a condition where detailed inspections remain practical, and oil or coolant leaks remain immediately visible rather than masked by accumulated grime.
Make engine bay cleaning a part of the same session as exterior washing and interior vacuuming twice per year. Frame it as a complete vehicle care day rather than a separate job, and it becomes a satisfying habit rather than a reluctant chore.
A well-maintained engine bay rewards consistent care with easier inspections, earlier leak detection, and a vehicle that simply feels better tended from every angle.