
Fuel economy was not exactly the priority when most vintage carburetors were designed. Engineers in the 1950s, 1960s, and 1970s were working with different expectations, different fuel prices, and different emissions standards than anything we deal with today.
Carburetors from that era were tuned to run rich, to idle smoothly over a wide range of conditions, and to deliver power on demand without worrying too much about whether they were burning more fuel than strictly necessary to accomplish those goals.
That engineering philosophy made sense at the time. But if you are driving a vintage carbureted vehicle today, you are paying modern fuel prices for a fuel delivery system that was calibrated for a world where gasoline cost less than thirty cents a gallon.
The good news is that a properly tuned vintage carburetor does not have to be a fuel economy disaster. With the right adjustments, the right replacement components where needed, and a systematic approach to calibration, most vintage carburetors can be tuned to deliver fuel economy improvements that make a real difference at the pump.
This is not about stripping the performance out of a classic car or turning a muscle car into a grocery getter. Proper carburetor tuning for fuel economy is about eliminating the excess, the unburned fuel that never made it to useful combustion, the float level that is sitting too high and drowning the mixture, the idle circuit that is flowing more fuel than the engine needs to hold a smooth idle.
Getting these parameters correct does not reduce the car’s performance. It improves drivability, reduces exhaust emissions, and extends the interval between fuel stops without asking anything of the engine that compromises its reliability or longevity.
Eight practical tips follow, each addressing a specific aspect of carburetor calibration and condition that directly affects fuel consumption. Work through them methodically, and the results will speak for themselves at the fuel pump.

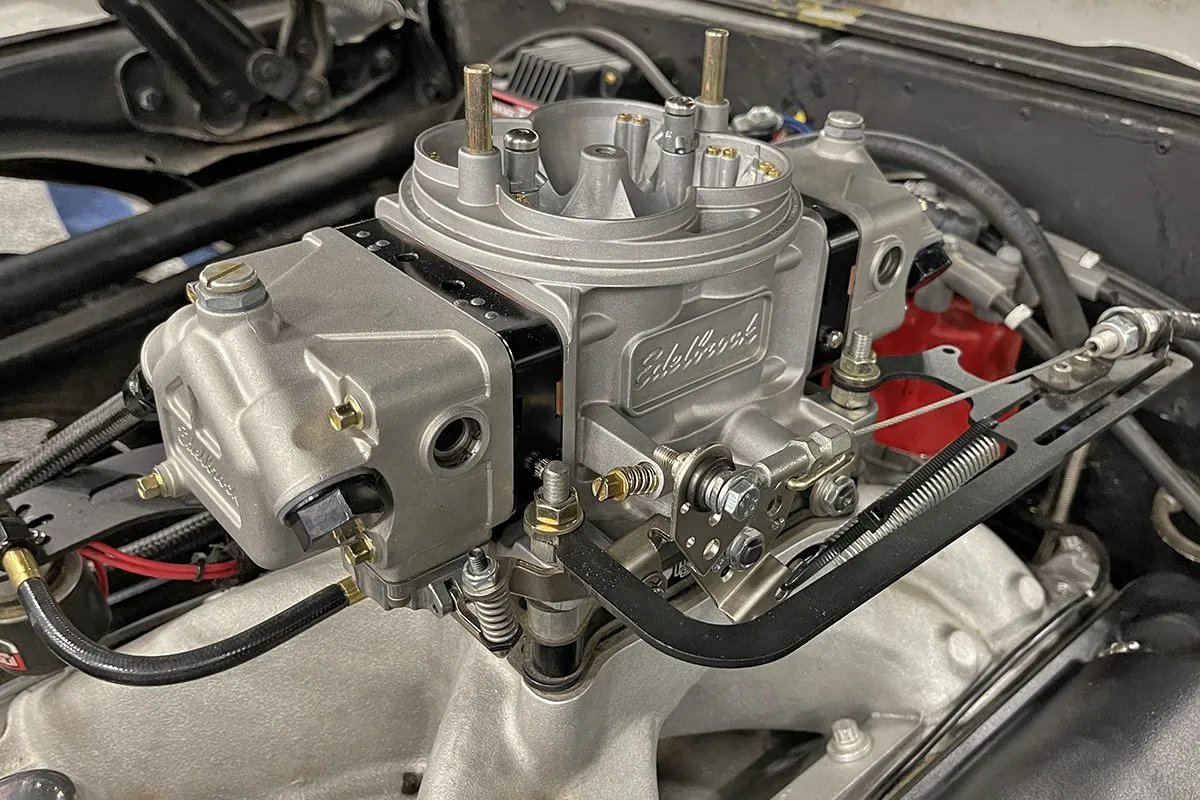
1. Set the Float Level Before Adjusting Anything Else
Float level is the foundation of everything else in carburetor calibration, and adjusting idle mixture screws, main jets, or accelerator pump timing before verifying the correct float level is exactly like adjusting the trim on a sailboat before checking whether there is a hole in the hull.
Everything else you do depends on the fuel level inside the float bowl being correct, and if that level is wrong, no amount of downstream adjustment will produce the fuel economy improvement you are chasing. The float level determines the head of fuel sitting above the main nozzle.
When the float level is set too high, fuel sits closer to the venturi and flows more readily into the airstream than the metering circuits are designed to deliver. This produces a consistently rich mixture across all operating conditions, burning more fuel than the combustion event requires and sending partially burned hydrocarbons out the exhaust.
An engine running rich from a high float level will often feel fine to drive, may even feel slightly more responsive than properly lean, because a rich mixture produces good throttle response at the expense of fuel economy.
Checking float level requires draining the float bowl, removing the float assembly, and measuring the float height against the manufacturer’s specification for that specific carburetor model. Holley carburetors can be checked with the sight glass method on a running engine, which is particularly convenient because it allows adjustment without disassembly.
Rochester Quadrajet float levels are checked with the air horn inverted and measured with a gauge wire or specific tool. Carter AFB and AVS carburetors each have their own checking procedure that is well documented in factory service manuals.
Vehicles like the 1967 Buick Skylark Gran Sport 400 V8 and the 1966 Oldsmobile 442 W-30 400 V8 both used Rochester Quadrajet carburetors in applications where float level settings directly affected fuel economy at highway cruise speeds, and owners who have corrected high float levels in these applications report measurable improvements in miles per gallon that become apparent within the first tank of fuel after adjustment.
After correcting the float level, allow the engine to reach full operating temperature and observe idle quality before touching the idle mixture screws. A properly set float level often reveals idle mixture settings that need correction because the previous rich idle mixture compensation was partially masking the float level problem.
Correct float level first, and every subsequent adjustment will be calibrated against an honest baseline rather than a compensated one.

2. Lean the Idle Mixture Screws to the Correct Setting Using Vacuum as Your Guide
Idle mixture screws are among the most frequently misadjusted components on any vintage carburetor, and the direction of common misadjustment is almost always toward rich rather than lean. Technicians who were primarily concerned with smooth idle quality during the era when these vehicles were serviced regularly had an incentive to err on the rich side of the adjustment range, because a slightly rich idle is smoother and more tolerant of engine variation than a slightly lean one.
From a customer satisfaction standpoint, a smooth idle mattered more than optimal fuel economy at 1970s fuel prices. Today, that conservative-rich bias means that most vintage carburetors coming in for service have idle mixture screws set richer than optimal, burning excess fuel during every minute of idling and during light-throttle operation, where the idle circuit remains partially active.
Correcting this does not require sophisticated equipment. A vacuum gauge connected to a manifold vacuum port gives you precise, real-time feedback about mixture quality that allows adjustment with confidence rather than guesswork.
The procedure for idle mixture adjustment using a vacuum gauge is straightforward. With the engine fully warmed to operating temperature, connect a vacuum gauge to the appropriate manifold vacuum port, which on most American V8 applications is a port on the intake manifold below the carburetor base.
Note the vacuum reading at idle, then slowly turn one mixture screw inward by one-quarter turn at a time, waiting several seconds between adjustments for the engine to stabilize. If the vacuum rises, you were too rich at that point, and further leaning is still productive. If the vacuum falls, you have crossed the optimal point and should back out slightly.
Owners of vehicles like the 1971 Mercury Cougar XR-7 351 Cleveland V8 and the 1969 AMC Javelin SST 390 V8 who have performed this adjustment correctly report noticeable improvements in both idle quality and light-throttle fuel economy, because the Autolite and Carter carburetors used on these platforms were frequently over-richened from the factory to ensure smooth cold-weather starting at the expense of warm-weather fuel efficiency.
After adjusting both idle mixture screws to peak vacuum, reset idle speed to factory specification using the idle speed screw rather than the throttle stop, because mixture adjustment and idle speed interact, and the final idle speed will have changed slightly during the mixture leaning process.
Also Read: 5 Honda Engines Known for Oil Dilution Issues vs 5 That Are Unkillable

3. Inspect and Resize the Main Jets for Your Engine’s Actual Operating Conditions
Factory main jet sizing reflects compromises made during original vehicle development that may not match the conditions under which you drive your vintage car today. Original jet sizing accounted for variations in altitude, temperature, humidity, fuel quality, and manufacturing tolerance across a production run of potentially hundreds of thousands of vehicles.
To ensure reliable operation across all these variables, manufacturers typically select jet sizes that were slightly rich for average conditions, accepting the fuel economy penalty in exchange for broad operating tolerance.
If you primarily drive your vintage vehicle at a specific altitude and in consistent temperature conditions, jet sizing optimized for your actual environment rather than a national average can produce measurable fuel economy improvements without sacrificing performance or reliability.
Leaning the main jets by one or two sizes from factory specification in a vehicle operated at altitude, where naturally aspirated engines run richer than at sea level due to reduced air density, is a well-established practice among vintage car enthusiasts who want their fuel economy to reflect the actual operating environment rather than a worst-case calibration compromise.
Jet sizing changes require access to replacement jets for the specific carburetor model in question. Holley main jets are numbered in increments that correspond to fuel flow rate, and the relationship between jet number and fuel flow is well-published in Holley’s technical literature.
Rochester Quadrajet jets have their own sizing convention, as do Carter, Autolite, Motorcraft, and Solex carburetors used on European imports. Working with the correct replacement jets rather than attempting to modify existing jets by drilling is strongly recommended, because drilled jets rarely produce the precise orifice geometry of manufactured replacements.
Vehicles like the 1974 Triumph TR6 2.5L Carbureted and the 1970 MG MGB GT 1.8L twin SU carburetor benefit from careful jet sizing review when operated at altitudes significantly different from where the factory calibration was established.
SU carburetors on British sports cars use a needle and jet system rather than discrete jet inserts, and needle selection combined with jet position adjustment provides the mixture control equivalent that fixed-jet carburetors achieve through jet size changes.
Record the original jet sizes before making any changes, and make one size change at a time, testing fuel economy over a consistent driving cycle between changes. This methodical approach builds a clear picture of how the engine responds to mixture changes and prevents overcorrection in either direction.

4. Clean and Inspect the Accelerator Pump Circuit to Eliminate Unnecessary Fuel Delivery
Accelerator pump circuits exist to prevent hesitation during sudden throttle opening, which is a genuine drivability requirement that results from the momentary vacuum drop that occurs when the throttle plate opens suddenly.
Without the accelerator pump’s shot of additional fuel to bridge this gap, carbureted engines hesitate and stumble during hard acceleration, an unacceptable behavior that the pump circuit was specifically designed to eliminate.
What the accelerator pump should not do is deliver more fuel than the minimum required to prevent hesitation, and at a longer duration than required to bridge the vacuum transition. Oversized accelerator pump cams, worn pump diaphragms or leather cups that do not seal efficiently, and incorrect pump timing all contribute to excess fuel delivery during throttle transitions that directly increase fuel consumption without improving performance.
Worn accelerator pump diaphragms or leather cups that have lost their sealing ability present an interesting problem: they deliver less fuel than a fresh pump during strong accelerator depression, but they may weep fuel continuously into the booster venturi from partial sealing failure.
This continuous fuel delivery is invisible in normal driving but contributes to a consistently rich mixture that affects fuel economy across all driving conditions rather than only during acceleration events. Inspect the accelerator pump discharge by removing the air cleaner, looking down the carburetor throat with a flashlight, and opening the throttle briskly by hand with the engine off.
A healthy accelerator pump delivers a sharp, solid stream of fuel from each discharge nozzle simultaneously with throttle opening. A weak, dribbling stream indicates a pump that is not building adequate pressure, and fuel economy will reflect this through the compensating richness that the rest of the metering system applies to maintain acceptable drivability.
Owners of vehicles like the 1965 Ford Galaxie 500 LTD 390 V8 and the 1968 Dodge Dart GTS 340 V8 who have replaced accelerator pump components with fresh units and selected the smallest accelerator pump cam that eliminates hesitation consistently report improved fuel economy at highway speeds where the pump circuit is largely inactive, because fresh pump seals eliminate the continuous fuel weeping that was previously enriching the mixture undetected.

5. Verify and Correct Ignition Timing Before Expecting Carburetor Adjustments to Work
Carburetor tuning and ignition timing are not independent variables. Attempting to optimize fuel economy through carburetor calibration alone, without verifying that ignition timing is correct, is addressing only half of the combustion equation.
Ignition timing that is retarded from optimal will cause incomplete combustion that wastes fuel, produces excess heat, and creates conditions where no carburetor adjustment can deliver the fuel economy the engine is capable of achieving with correct timing.
Optimal ignition timing for fuel economy places the spark advance at a point where the pressure rise from combustion reaches its peak at approximately 14 to 16 degrees after top dead center, which is where the piston can extract maximum work from the expanding combustion gases.
Retarded timing delays this pressure peak, producing combustion that is still occurring when the piston has moved too far down the bore to extract efficient work from the expanding gas. Advanced timing produces detonation and preignition that destroy efficiency from the opposite direction.
Vacuum advance is a critical component of fuel economy optimization that is frequently misunderstood and sometimes disabled by well-intentioned but misinformed previous owners. Full vacuum advance, connected to manifold vacuum rather than ported vacuum, provides substantial additional timing advance at light throttle and cruise conditions, precisely the operating range where fuel economy is most sensitive to timing optimization.
Compare your measured curve against the factory specification for that distributor, and if the advance is insufficient, light, or slow, worn distributor advance weights and springs are likely the cause. Replacement advance kits for most vintage distributors are available from restoration suppliers and allow accurate calibration of the advance curve for both performance and economy.

6. Address Air Leaks Around the Carburetor Base and Intake Manifold Gaskets
Air leaks within the intake system remain one of the most common causes of poor fuel efficiency in older carbureted vehicles, yet they are frequently overlooked during routine maintenance. These leaks usually occur around the carburetor base, throttle shaft, or intake manifold gasket, and they introduce unmetered air into the engine after the fuel has already been measured by the carburetor.
This disrupts the intended air-to-fuel ratio and produces a lean mixture that cannot be corrected through normal adjustment procedures. When excess air enters the system downstream of the carburetor’s metering circuits, the engine receives more air than fuel at idle. Mechanics who are unaware of the underlying issue often attempt to correct the condition by enriching the mixture through carburetor adjustments.
While this may temporarily stabilise idle quality, it creates a richer mixture than necessary during normal driving. As a result, fuel consumption increases, especially during part throttle operation, where intake vacuum is high, and the leak draws in more air.
Identifying these leaks requires a systematic approach. One common method involves introducing a controlled source of combustible gas, such as propane, around suspected leak points while the engine is running. Any change in engine speed indicates that the gas has entered the intake system through a leak.
Another widely accepted method involves the use of a smoke testing device, which introduces visible vapour into the intake system. Leaks become apparent as the vapour escapes through faulty sealing points. This approach is widely used in professional workshops due to its accuracy and safety.
Gasket condition plays a major role in preventing air leaks. Original gaskets, often made from paper or fibre materials, tend to degrade due to heat exposure and the ethanol content present in modern fuel. Replacing these with ethanol-resistant materials such as nitrile rubber improves durability and reduces the likelihood of leakage.
Vehicles such as the 1958 DeSoto Fireflite 361 Hemi and the 1966 Kaiser Jeep Gladiator Thriftside 232 Tornado OHC Six have shown measurable improvement in fuel consumption after proper leak correction. Addressing these issues before making carburetor adjustments ensures that the engine operates with a stable and efficient air-fuel mixture.

7. Match the Carburetor CFM Rating to the Engine’s Actual Airflow Requirements
Selecting the correct carburetor size is an essential aspect of achieving proper engine performance and fuel efficiency in vintage vehicles. A common misunderstanding among enthusiasts is the belief that installing a larger carburetor will automatically improve power output.
In practice, an oversized carburetor often produces the opposite effect, particularly during everyday driving conditions where engine speed and airflow demand remain moderate. Carburetors function by using airflow through a venturi to draw fuel into the intake stream.
This process depends heavily on air velocity. When a carburetor is too large for the engine, airflow velocity through the venturi becomes insufficient at lower engine speeds. Reduced velocity leads to poor fuel atomisation, causing larger fuel droplets to enter the intake manifold. This results in incomplete combustion, reduced efficiency, and increased fuel consumption.
A properly sized carburetor maintains adequate airflow velocity across the engine’s operating range. This ensures that fuel is atomised effectively, allowing for efficient combustion and improved fuel economy. Determining the correct size involves calculating the engine’s airflow requirement using displacement, maximum operating speed, and volumetric efficiency.
For a typical naturally aspirated street engine operating up to 5,500 RPM with approximately 80 percent efficiency, the required carburetor capacity is often smaller than many expect. For example, a 350 cubic inch engine under these conditions requires approximately 560 CFM.
Installing a 750 or 850 CFM unit in such a case provides no practical benefit during normal driving and may reduce efficiency due to poor fuel mixing at lower speeds. Vehicles such as the 1972 Chevrolet Monte Carlo SS 454 and the 1970 Plymouth Sport Fury GT 383 Magnum were originally equipped with carburetors matched to their intended usage.
Owners who replaced these with larger units sometimes observed higher fuel consumption without improvement in everyday performance. Using a carburetor that matches the engine’s actual airflow requirement ensures balanced performance, efficient fuel use, and consistent engine response under typical driving conditions.
Also Read: Top 5 Diesel Engines With the Simplest Glow Plug Systems for Cold Starts

8. Service the Power Valve and Metering Rods for Accurate Part-Throttle Fuel Delivery
Power valves and metering rods are the carburetor’s mechanism for varying fuel delivery between light-load economy operation and heavy-load performance operation, and their proper function is directly responsible for the fuel economy that a vintage carburetor delivers during the steady-state cruise conditions that dominate most driving situations.
When these components are worn, incorrectly selected, or functionally compromised, the carburetor loses its ability to reduce fuel delivery at light throttle and defaults to a mixture that is richer than part-throttle conditions require.
Holley carburetors use a power valve, a vacuum-operated valve that opens additional fuel passages under low-vacuum conditions that indicate high engine load, and closes those passages under high-vacuum conditions that indicate light throttle operation.
A blown power valve, a common failure on Holley carburetors that have been backfired through the intake, remains open continuously regardless of manifold vacuum, delivering maximum fuel enrichment at all throttle positions, including light cruise, where it should be fully closed.
Fuel economy from a blown power valve carburetor is dramatically worse than from a correctly functioning unit, and the fix is simply replacing the power valve with a new unit of appropriate opening point for the engine’s manifold vacuum at idle.
Rochester Quadrajet carburetors use metering rods suspended in the primary main jets to vary fuel delivery. At light throttle and high manifold vacuum, a vacuum piston pulls the metering rods upward so their tapered shanks obstruct the jet orifice, reducing fuel flow to lean-cruise levels.
Under heavy throttle and low vacuum, the rods drop down to their wide shank diameter, uncovering the full jet orifice for maximum fuel delivery. Metering rod selection and condition directly determine the leanness achievable at cruise, and worn, bent, or incorrectly specified rods prevent the Quadrajet from achieving its designed part-throttle economy.
Owners of vehicles like the 1973 Cadillac Eldorado 500 V8 and the 1976 Buick LeSabre Custom 455 V8, both equipped with Rochester Quadrajet carburetors, who have serviced the metering rod and vacuum piston system with fresh components and correct rod specification consistently report that the Quadrajet’s legendary part-throttle fuel economy returns after this service, validating the carburetor’s long-standing reputation as one of the most fuel-efficient four-barrel designs ever produced.
Servicing these components begins with a complete carburetor disassembly and cleaning that allows inspection of metering rod condition and verification of vacuum piston free movement. Replacement metering rod and jet combinations are available from Quadrajet restoration specialists in configurations matched to specific engine applications, making it straightforward to restore correct calibration rather than approximating it.