
A family road trip should begin with preparation, not last-minute repairs or roadside surprises. Even a vehicle that performs reliably during daily commuting can develop problems when loaded with passengers, luggage, and supplies for several hours of highway driving.
Checking essential safety systems before departure helps reduce preventable risks and gives drivers more confidence behind the wheel. Tires, brakes, fluids, lights, and emergency equipment all deserve attention, while child restraints and driver readiness are equally important.
These seven checks cover practical steps families can take before leaving home, helping make a long journey safer and more comfortable.
1. Inspect Tire Pressure, Tread Depth and Sidewalls
Tires are the only parts of a vehicle that maintain direct contact with the road, so their condition deserves attention before a family trip. A vehicle carrying several passengers and a full luggage compartment places additional demands on its tires.
Incorrect pressure, worn tread, or damaged sidewalls can affect handling, braking, and resistance to hydroplaning. Checking all four tires, along with the spare if the vehicle has one, is a simple step that can prevent an avoidable roadside problem.
Start by checking tire pressure when the tires are cold, ideally before driving or after the vehicle has been parked for at least three hours. Use the pressure listed on the driver’s door-jamb placard or in the owner’s manual.
Do not use the maximum pressure printed on the tire sidewall as the recommended operating pressure. The correct figure is determined by the vehicle manufacturer and may differ between front and rear tires. If the vehicle will carry a heavy load, check the manual for any specific pressure guidance.
Next, inspect tread depth. The US legal minimum in many states is 2/32 of an inch, but tires can lose wet-road performance before reaching that limit. A tread-depth gauge provides a more reliable measurement than visual inspection alone.
Look for uneven wear, cracks, bulges, exposed cords, and objects embedded in the tread. A bulge in the sidewall can indicate internal damage and should be assessed by a tire professional.
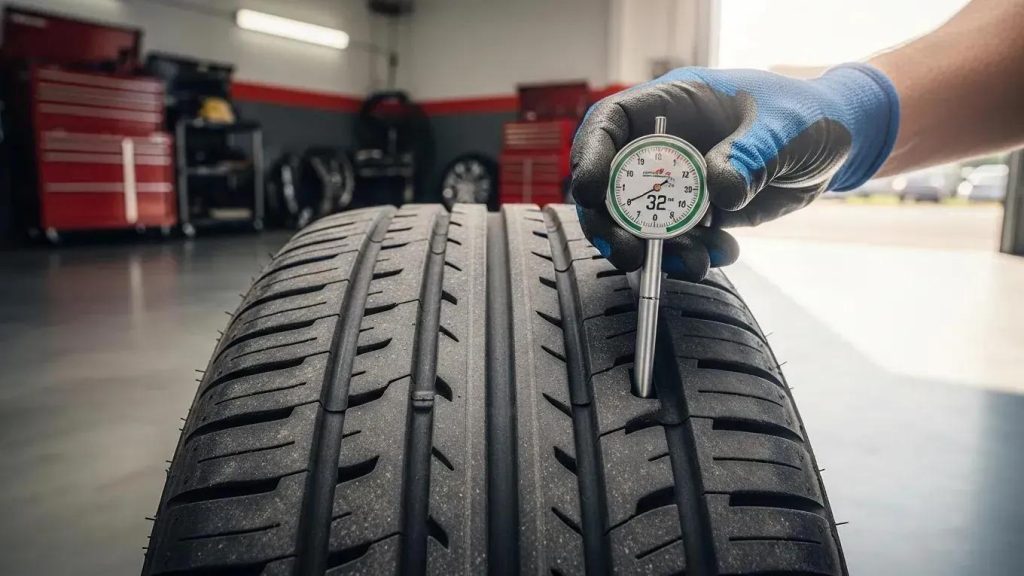
Do not forget the spare tire, if fitted. A spare with low pressure or damaged rubber may be useless when needed. Also check whether the vehicle uses a temporary spare with speed and distance restrictions.
If the tires show serious damage or uneven wear, have them inspected before departure rather than hoping they will survive the journey.
2. Test the Brakes Before Loading the Family
A fully loaded vehicle needs dependable stopping power, especially when travelling through busy highways, mountain roads, or unfamiliar towns. Passengers and luggage increase the weight the brakes must slow down.
That additional load does not automatically mean the brakes will fail, but it makes their condition particularly important before a long journey. A brake system that already has worn pads, damaged rotors, or a hydraulic problem should not be ignored.
Begin with a careful check of how the brake pedal feels. It should respond consistently and should not sink unusually close to the floor when held under steady pressure. A soft or spongy pedal can indicate air in the hydraulic system or another fault.
If the pedal feels unusually hard, braking performance has changed, or the vehicle pulls strongly to one side when stopping, arrange a professional inspection before travelling.
Pay attention to warning signs during normal driving. Grinding noises can indicate severely worn brake components, while squealing may be caused by worn pads or other issues. A steering wheel or brake pedal that vibrates during braking can point to rotor or suspension problems.
A brake warning light should never be dismissed simply because the vehicle still appears to stop normally. Consult the owner’s manual and have the cause diagnosed.
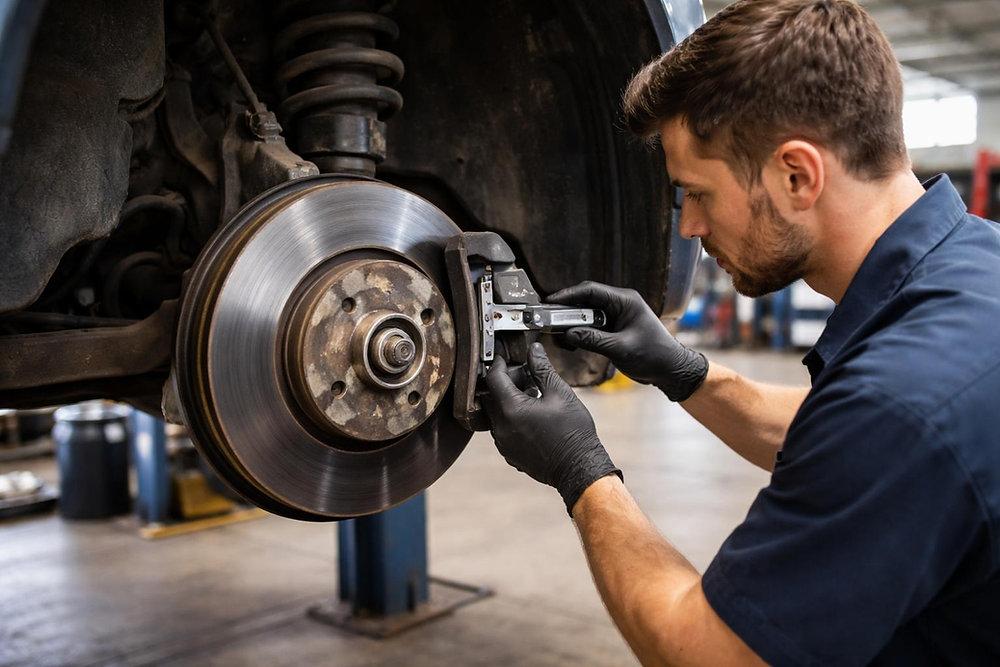
Brake fluid also deserves attention. Check the reservoir level according to the manufacturer’s instructions and look for visible leaks around the wheels or beneath the vehicle. Do not simply top up fluid to hide a recurring drop in level. Low fluid can indicate pad wear or a leak, and a hydraulic leak requires prompt professional attention.
If the brakes are due for service, complete that work before departure. Avoid testing emergency stops on public roads. A qualified technician can inspect pad thickness, rotor condition, calipers, hoses, and fluid to determine whether the system is ready for a long trip.
3. Check Engine Oil, Coolant, and Other Essential Fluids
Long highway journeys can expose an existing fluid problem that may go unnoticed during short trips around town. Engine oil, coolant, brake fluid, and windshield washer fluid all play important roles in keeping a vehicle safe and functional.
Before leaving, take a few minutes to inspect the levels and look for signs of leakage. This is especially important if the vehicle has not received routine maintenance recently or has previously shown warning lights.
Check engine oil with the vehicle parked on level ground and follow the procedure in the owner’s manual. Some cars require the engine to be switched off for a specified period, while others use an electronic oil-level measurement system.
If the vehicle has a dipstick, remove it, wipe it clean, reinsert it, and check the reading. The level should remain within the marked operating range.
Use only oil that meets the manufacturer’s specified viscosity and performance requirements. Adding an unsuitable oil can cause problems, particularly in engines with strict lubrication requirements.
Coolant should be inspected when the engine is completely cold. Never remove a radiator cap or open a pressurized cooling-system reservoir while the engine is hot. Hot coolant can escape under pressure and cause serious burns.
Check the reservoir level against its markings and look for leaks, damaged hoses, or dried coolant residue. A low level may indicate a leak that needs attention rather than simply requiring another refill.
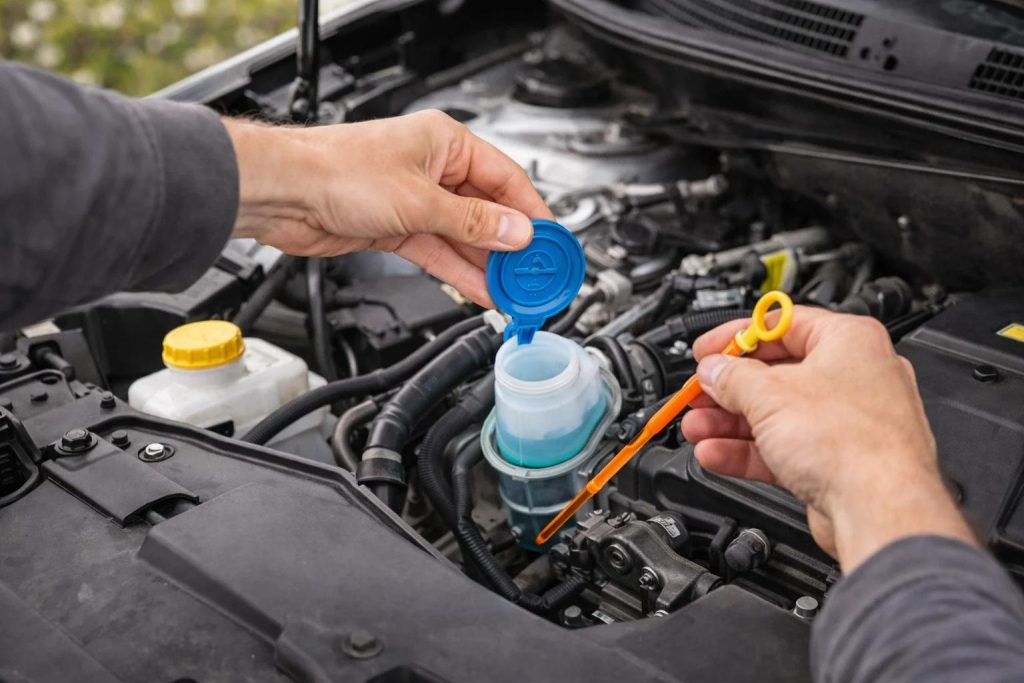
Brake fluid and transmission fluid should be checked according to the vehicle’s design. Some modern vehicles do not provide an owner-accessible transmission dipstick, so do not attempt an improvised inspection. Washer fluid is easy to overlook, but a full reservoir helps maintain visibility when insects, dust, and road grime collect on the windshield.
Finally, inspect the ground beneath the parked vehicle for fresh fluid spots. Oil, coolant, or other unexplained leaks should be investigated before departure. A quick inspection cannot replace scheduled servicing, but it can reveal warning signs before they become serious problems on the highway.
4. Verify Headlights, Brake Lights, and Turn Signals
A vehicle’s lighting system is essential for seeing the road and making sure other drivers can understand your intentions. This becomes particularly important on family trips that involve early departures, nighttime driving, rain, fog, or unfamiliar roads.
A failed brake light can prevent following drivers from recognizing that the vehicle is slowing down, while a faulty turn signal can create confusion during lane changes and intersections.
Begin by switching on the headlights and checking both low-beam and high-beam operation. Walk around the vehicle to confirm that the lamps illuminate properly. Look for cracked lenses, moisture inside the housing, or lights that appear unusually dim.
Cloudy headlight lenses can also reduce useful light output, even when the bulbs are working. If visibility is poor because of damaged or heavily oxidized lenses, have them restored or replaced appropriately.
Next, check the front and rear turn signals, hazard lights, brake lights, and reverse lights. You can ask another person to stand behind the vehicle while you press the brake pedal.
If travelling alone, use a safe reflective surface or have someone help before departure. Do not assume that a dashboard indicator flashing normally proves that every exterior lamp is functioning correctly.
The license-plate lights and side marker lamps should also be inspected. Their condition matters for visibility and legal compliance, particularly when driving after dark. Replace failed bulbs with the correct specification for the vehicle.

Some modern cars use LED lighting assemblies that require professional repair rather than a simple bulb replacement.
Windshield wipers and the washer system belong in this inspection as well. Wiper blades that leave streaks, skip across the glass, or make excessive noise may need replacement. Clean the windshield inside and out, because glare and dirt can make nighttime visibility worse.
Complete this check before packing the vehicle. Once luggage covers the rear of the car or the family is waiting to leave, small lighting faults are easier to overlook.
5. Inspect the Battery and Charging System
A weak battery can turn a planned family departure into an unexpected delay. The problem may appear without much warning, particularly if the battery is several years old or the vehicle has been used mainly for short journeys.
Before a long trip, check for signs of battery deterioration and make sure the charging system is functioning correctly. This is especially useful when travelling through remote areas where assistance may take longer to arrive.
Start with a visual inspection. Look for corrosion around the battery terminals, loose connections, damaged cables, or a swollen battery case.
Corrosion can interfere with electrical connections, while a swollen case may indicate internal battery damage or exposure to excessive heat. Do not touch leaking battery material or attempt repairs if the battery appears damaged. Have it inspected by a professional.
Pay attention to starting behaviour. If the engine cranks more slowly than usual, the headlights dim noticeably during startup or electrical accessories behave inconsistently, the battery may be weakening. These symptoms do not prove that the battery is faulty, because charging-system problems and other electrical issues can produce similar signs.
A professional battery test is more useful than relying only on the dashboard voltage display. Many repair shops can measure battery condition and test the alternator’s charging performance. This helps identify whether the battery can still hold an adequate charge and whether the vehicle is replenishing it correctly while running.
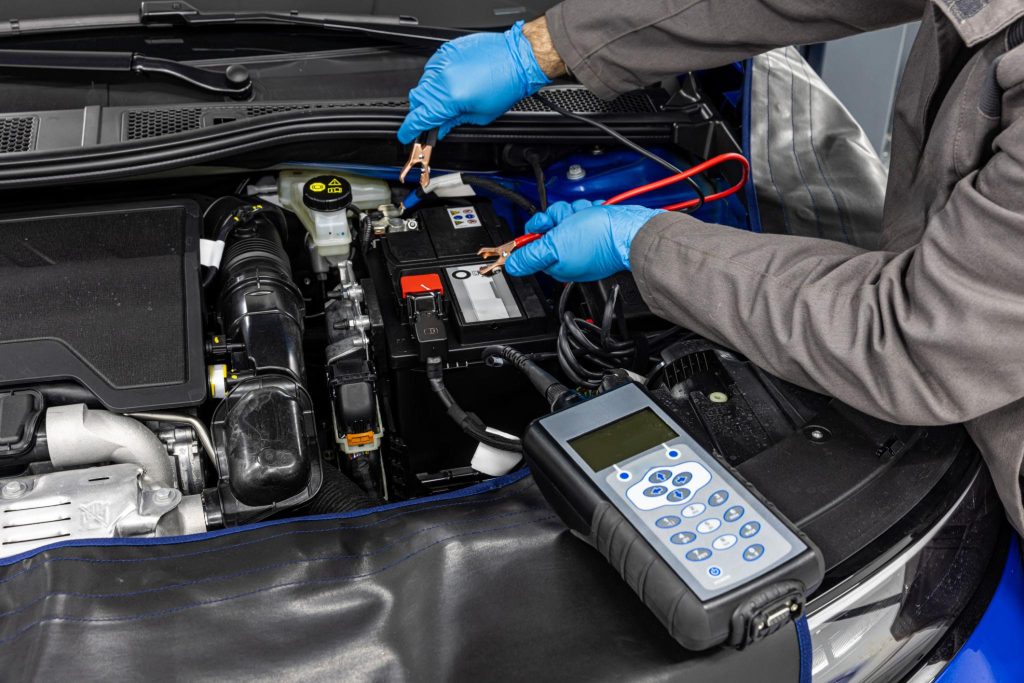
Battery age is another factor. Many conventional automotive batteries last approximately three to five years, although climate, driving habits, vehicle design and maintenance can shorten or extend their service life. This is a general estimate, not a guaranteed replacement interval.
If the battery is approaching the end of its expected service life, testing it before departure is sensible. Also confirm that the vehicle’s jump-start points and procedures are explained in the owner’s manual. Some modern vehicles require specific connection points and precautions. Never attempt to jump-start a battery that is visibly damaged, leaking or frozen.
6. Secure Child Seats, Seat Belts and All Luggage
A road trip often means carrying more passengers and luggage than a vehicle normally handles during daily use. That makes cabin preparation a safety task, not simply a matter of keeping the interior tidy.
Every passenger should have an appropriate seat and a properly fitted restraint, while loose objects must be secured so they cannot become dangerous projectiles during sudden braking or a collision.
Begin with child safety seats. Check that each seat is appropriate for the child’s age, height and weight, following both the child-seat manufacturer’s instructions and the vehicle owner’s manual. In the United States, children under 13 should generally ride in the rear seat when it is available.
The American Academy of Pediatrics recommends keeping children rear-facing for as long as possible, until they reach the maximum height or weight limit permitted by their car seat. Do not turn a child forward-facing simply because they have reached a particular birthday.
Inspect the seat’s installation. If using the LATCH system, confirm that the lower anchors and top tether are used according to the instructions. If installing with a seat belt, make sure it locks and holds the restraint firmly.
A correctly installed seat should not move more than one inch side to side or front to back when checked at the belt path. Avoid using both LATCH and a seat belt together unless the manufacturer specifically permits it.
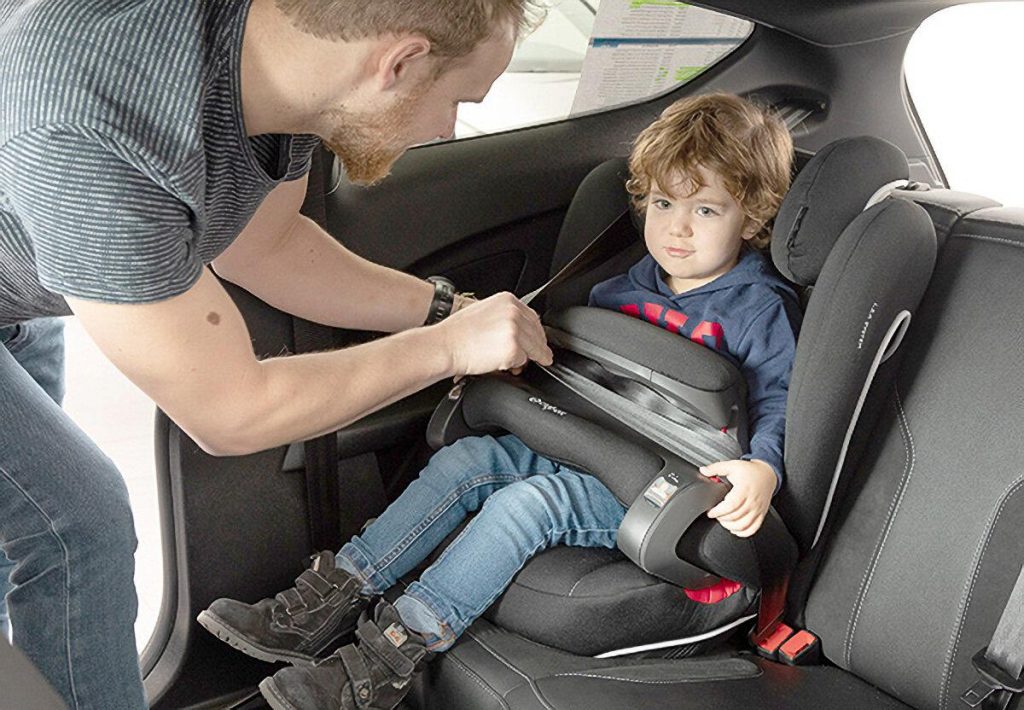
Next, check every passenger’s seat belt. Look for fraying, twisted webbing, damaged buckles or belts that do not retract properly. Never place more passengers in a seating row than there are designated seat belts.
Finally, secure luggage, shopping bags, coolers and other loose equipment. Heavy objects should be placed low and secured in the cargo area. Do not stack luggage so high that it blocks the driver’s rear visibility. In an emergency stop, unsecured items can move forward with considerable force, creating a serious injury risk.
7. Prepare an Emergency Kit and Check Driver Readiness
Even a well-maintained vehicle can experience a flat tire, dead battery or unexpected breakdown. Preparing for these situations before departure can make a difficult roadside stop safer and less stressful.
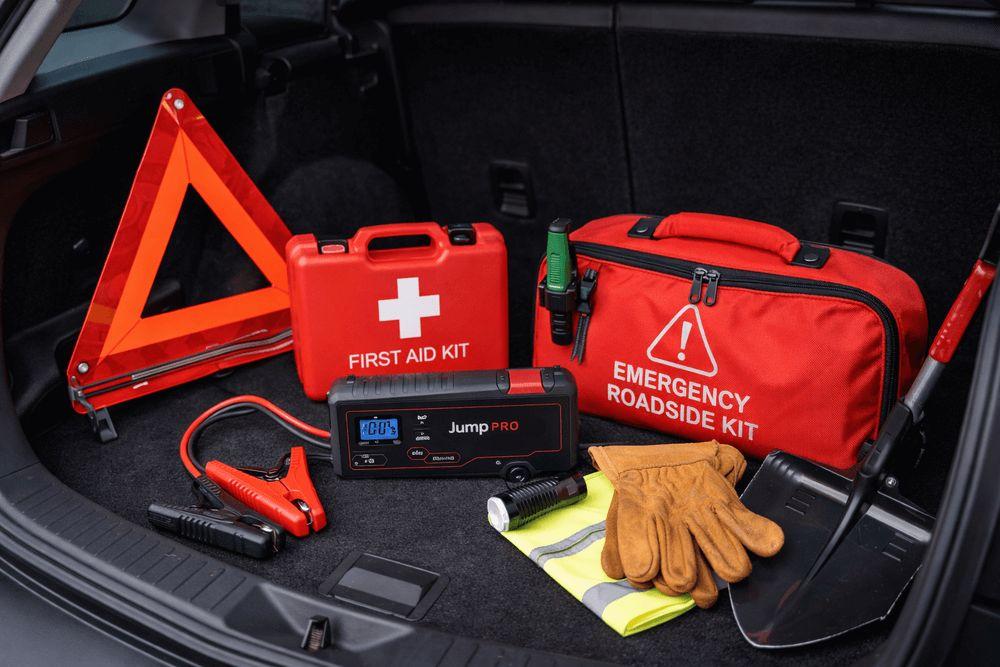
A family emergency kit should be suited to the route, weather and number of passengers rather than consisting of random items thrown into the trunk at the last minute.
Start with a properly stocked first-aid kit, flashlight, spare batteries, reflective warning devices and a basic set of tools. Include drinking water and non-perishable snacks, particularly when travelling through areas with long distances between service stations.
A phone charger or power bank can help maintain communication, while a printed list of emergency contacts is useful if a phone becomes unavailable.
Check whether the vehicle has a usable spare tire, jack and lug wrench. If it uses a tire repair kit or an inflator instead, understand its limitations before leaving. Some tire sealants cannot repair large punctures, sidewall damage or certain types of tire failure. Roadside assistance membership details and insurance information should also be accessible.
Driver preparation is just as important as equipment. The National Highway Traffic Safety Administration warns that drowsy driving can impair attention and reaction time. Plan regular breaks, share driving responsibilities when possible and avoid beginning a long journey after inadequate sleep.
Caffeine is not a substitute for proper rest. If the driver feels sleepy, pull over somewhere safe and take a break rather than trying to push through.
Never leave children or pets unattended inside a parked vehicle, especially in hot weather. Temperatures inside a vehicle can rise rapidly, creating a potentially life-threatening situation.
Before setting off, check weather and road conditions, plan fuel or charging stops and tell someone your expected route if travelling through remote areas. A little preparation can make an emergency more manageable and help the family reach its destination safely.