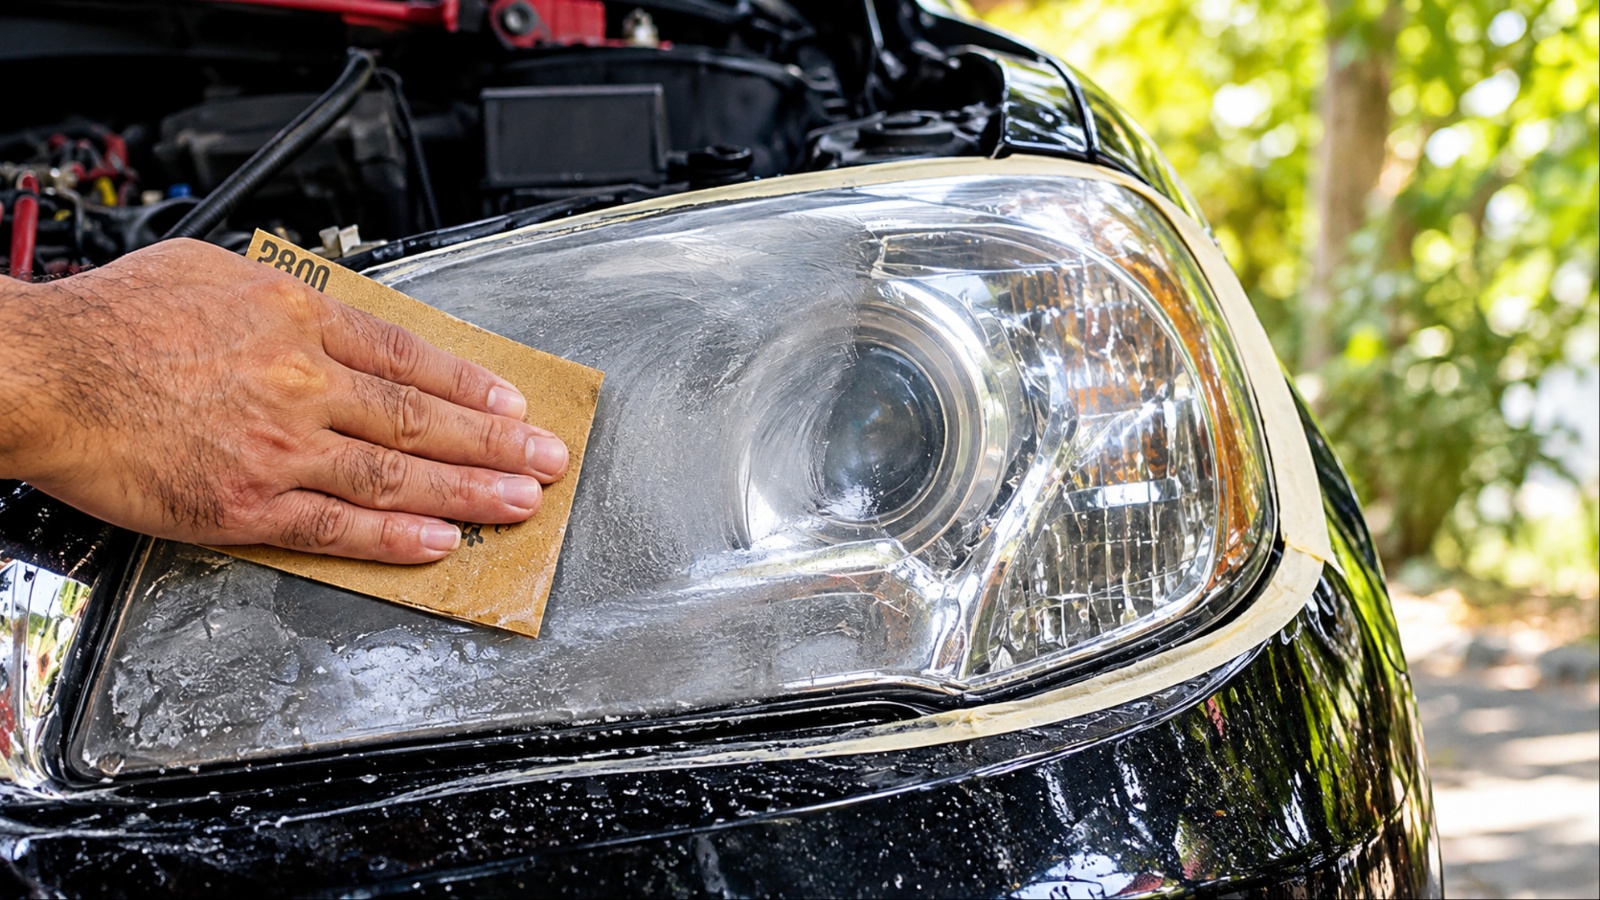
Cloudy headlights are more than a cosmetic annoyance. Oxidized plastic can scatter light, reduce clarity, and make an older vehicle look neglected. The good news is that severe clouding does not always require expensive replacement assemblies.
Many yellowed lenses can be improved with inexpensive abrasive and polishing methods, provided the damage is primarily on the outer surface. The important part is matching the treatment to the problem.
A lens covered with oxidation needs surface correction, while moisture trapped inside the housing or damaged plastic requires a different solution. These methods focus on inexpensive approaches using products and materials that can generally be purchased for less than $20.
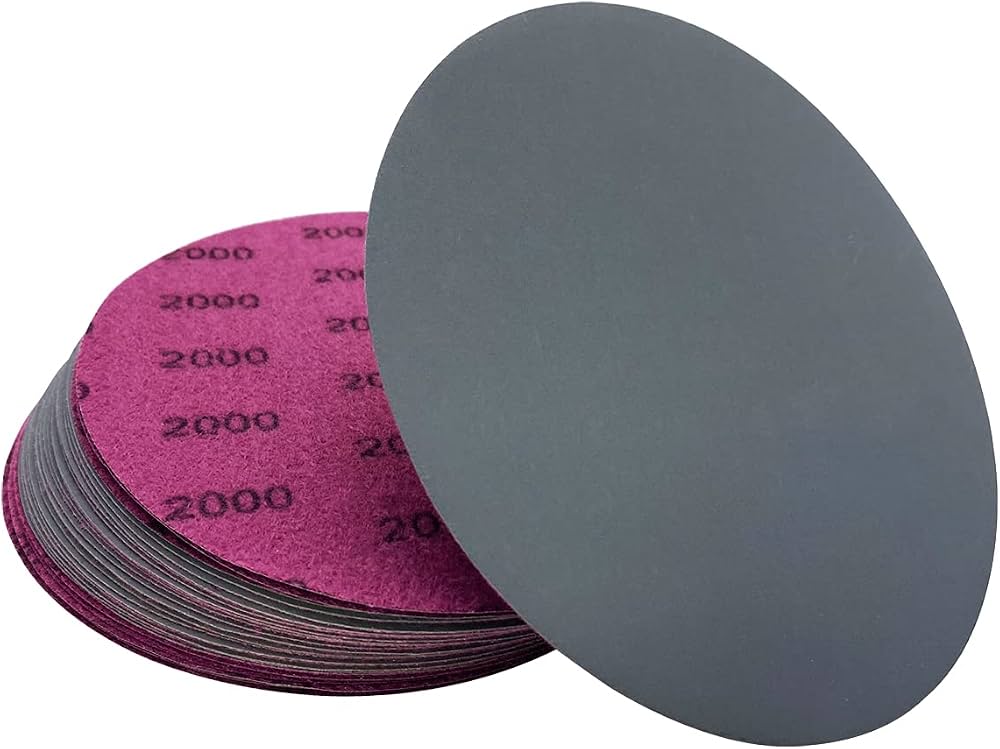
1. Wet Sanding With 2000-Grit Abrasive Paper
Wet sanding is one of the most effective inexpensive methods for heavily oxidized headlights because it physically removes the damaged outer layer instead of merely covering it with a temporary dressing.
When a polycarbonate lens becomes severely yellowed, the surface can develop a layer of oxidation and microscopic damage that ordinary household cleaners cannot remove.
The process starts with cleaning the lens thoroughly. Masking tape should be placed around the headlight to protect adjacent paint. The 2000-grit paper should then be soaked in clean water and used gently with plenty of lubrication. The objective is to create a uniformly dull, smooth surface rather than aggressively grinding into the plastic.
For extremely neglected lenses, a coarser grade may be needed before moving to 2000 grit, but starting aggressively increases the possibility of unnecessary material removal.
The National Highway Traffic Safety Administration recognizes that headlamp performance depends on proper optical performance and maintenance, making restoration more than a cosmetic exercise.
Once the oxidation has been removed, the lens will look hazy. That is expected. The sanding marks must then be refined with progressively finer abrasives or polished with a suitable plastic compound.
The biggest mistake is stopping after sanding. A hazy lens immediately after sanding is not a failed repair. It is simply a surface that still needs refinement.
Wet sanding works particularly well when the entire lens has consistent yellowing. It is less appropriate for internal condensation, cracks, deep crazing, or damage on the inside of the housing.
The $20 budget is realistic because abrasive paper and masking tape are inexpensive. The real value comes from using the right technique. Apply plenty of water, keep pressure light, work evenly, and inspect the surface frequently.
2. Plastic Polish With a Microfiber Applicator
Plastic polish is a better starting point when a headlight is hazy but not severely yellowed. Unlike wet sanding, polishing removes a smaller amount of material and can restore clarity without immediately introducing a new sanding stage.
Products specifically formulated for plastic lenses use fine abrasives designed to reduce surface imperfections. Meguiar’s PlastX, for example, is marketed for restoring clarity to clear plastic surfaces and removing fine scratches, cloudiness, and oxidation.
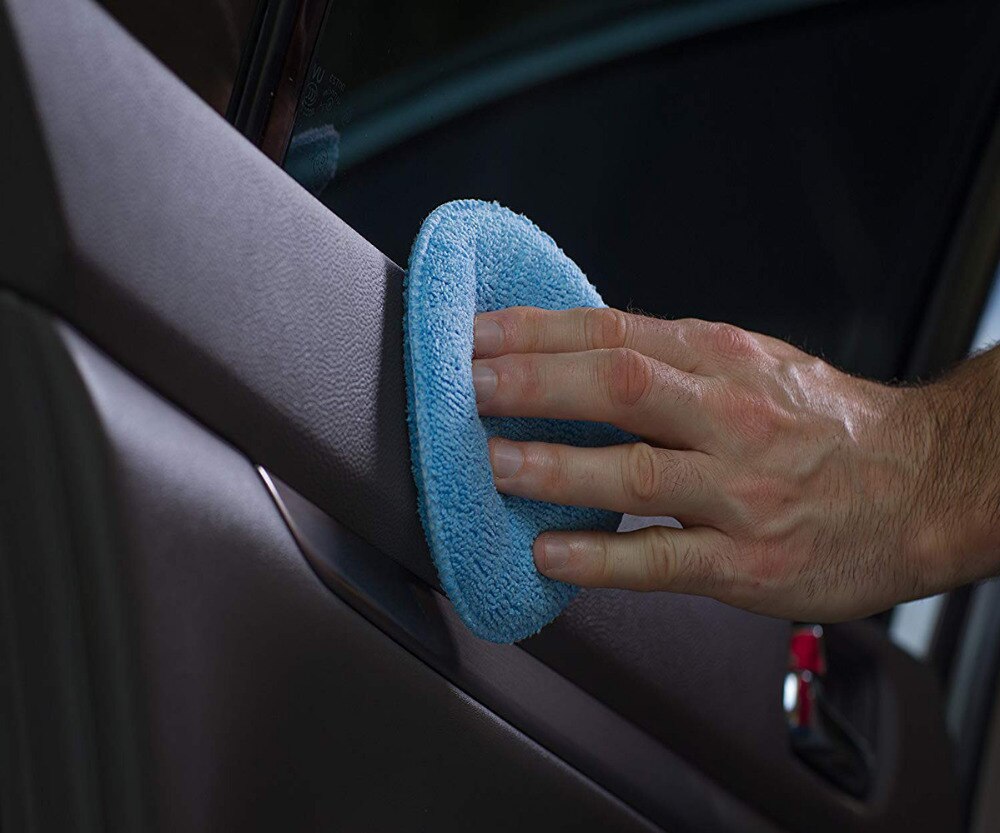
Application technique matters more than most people expect. The lens should first be washed and dried so dirt does not become an additional abrasive. A clean microfiber applicator can then be used with moderate pressure over a small section. Working a test area first is useful because it shows whether the haze is shallow enough for polish to handle.
If the lens becomes clearer after one or two passes, there is little reason to move immediately to sandpaper. The least aggressive successful method is generally preferable because it removes less material from the lens.
A machine polisher can accelerate the process, but it is not necessary for a small headlight. Hand application is slower but gives a novice considerably more control.
There is one important limitation to keep in mind. Plastic polish cannot repair damage that extends deep into the lens. Severe cracking, deep pitting, or internal deterioration cannot be corrected by polishing the exterior, so the original optical clarity may not be fully restored.
After polishing, the lens should receive UV protection. This is critical because the factory UV-resistant surface can be compromised when oxidation is removed. A restoration that produces impressive clarity but leaves bare plastic exposed to sunlight can deteriorate again much sooner.
For lightly cloudy headlights, however, plastic polish remains one of the simplest ways to improve appearance and optical clarity while staying comfortably below the $20 budget.
3. A 3M Headlight Restoration Kit
A complete headlight restoration kit can be a better bargain than buying separate sandpaper, compound, and protectant when the lens has moderate or severe oxidation. The important point is that a genuine restoration kit uses a progressive abrasive process, rather than relying on one aggressive product to do everything.
3M’s current U.S. headlight restoration systems are specifically designed for plastic lenses and use multiple stages of abrasion to remove oxidation, yellowing, scratches, and surface buildup. Its kits can include 1000-grit and 3000-grit refining discs, rubbing compound, and clear-coat wipes, depending on the version.
The progression matters. Starting with a relatively coarse abrasive removes the degraded outer layer. A finer stage then removes the marks left by the first abrasive. The final polishing stage restores transparency before a protective coating is applied.
3M specifically warns that the degraded surface layer needs to be completely removed before the final stages. If oxidized material remains, the finished lens can still look cloudy.
A kit also reduces the temptation to improvise with household chemicals. Headlight haze is generally a surface-degradation problem, not something that can be solved by simply washing the plastic harder.
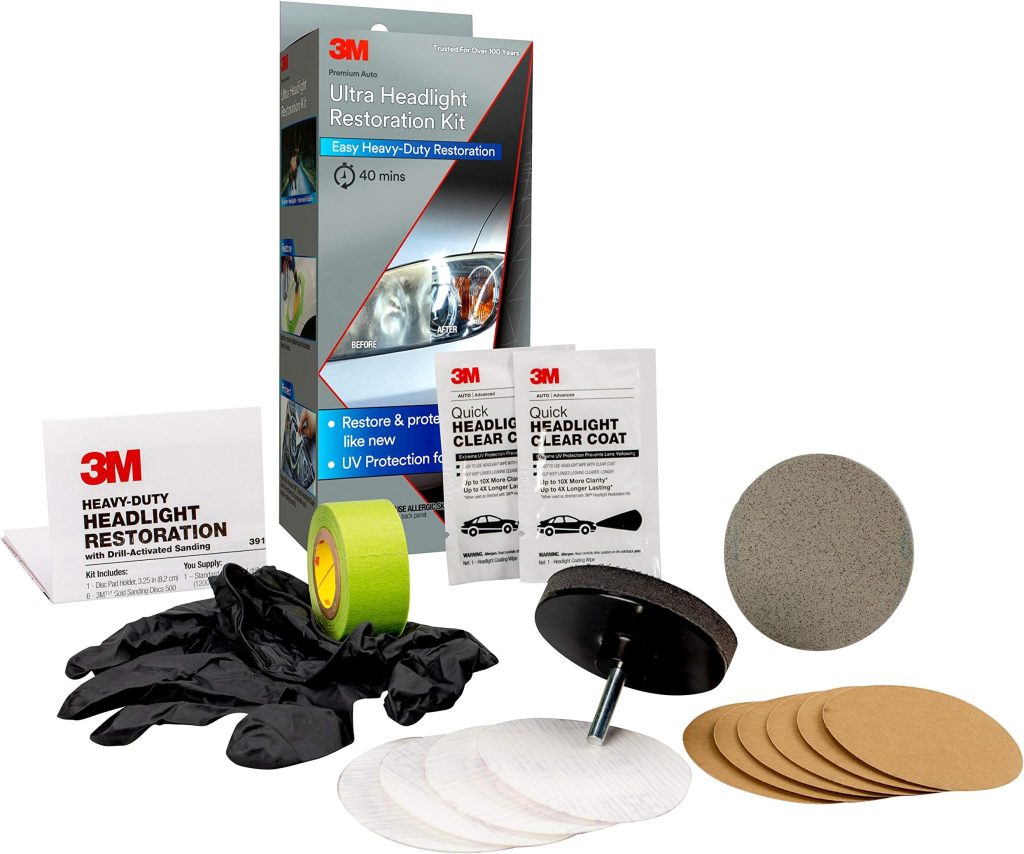
The final protective stage is particularly important. Restoring the lens removes the degraded surface and can compromise the original UV protection, so leaving freshly restored plastic unprotected can allow oxidation to return sooner. 3M’s current kits include clear-coat wipes specifically for this reason.
A kit can sometimes exceed $20 depending on the seller, so this method fits the budget only when a discounted kit or basic version is available. When it does, it provides one of the most structured DIY approaches for seriously cloudy lenses.
4. A Dedicated UV Headlight Sealant
A UV headlight sealant is not the product that removes the cloudy layer. It becomes valuable after the oxidation has been corrected. That distinction is easy to miss, yet it can determine whether a restoration remains clear for months or begins deteriorating again.
Modern headlight lenses are commonly made from polycarbonate plastic and are supplied with an exterior protective layer. 3M explains that many lenses have a thin UV coating or thermal-cap layer and that degradation of this surface contributes to yellowing and haze.
Once the damaged material is sanded or polished away, the restored plastic needs protection. A dedicated UV-resistant coating provides that additional barrier.
Some inexpensive products are sold specifically as headlight sealing wipes or coatings, allowing the owner to complete the final stage without purchasing a professional refinishing system.
The preparation underneath the sealant is crucial. Applying a UV coating over an incompletely restored lens does not remove the yellow material. It simply seals whatever condition the lens is already in.
The best sequence is therefore clean, correct, refine, dry, and then seal. 3M’s current restoration systems follow this philosophy essentially, combining abrasive restoration with a dedicated clear-coat wipe.
This method is particularly useful when the headlight has already been restored with inexpensive sandpaper or polish. Instead of buying another aggressive compound, the owner can concentrate on protecting the newly clarified surface.
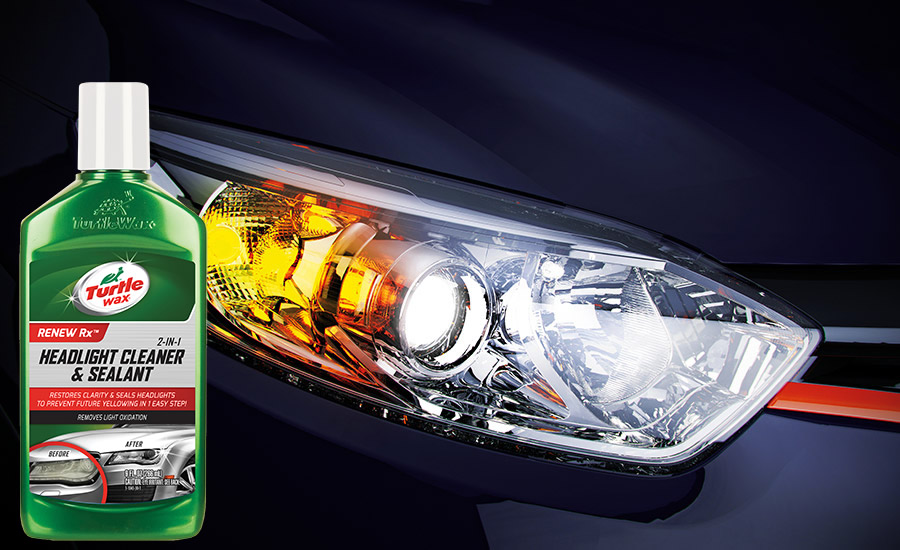
One warning is worth noting. Use a product specifically designed for automotive plastic headlamp lenses. Household UV coatings, generic clear sprays, or incompatible solvents can cause optical distortion or damage the plastic.
At under $20, a dedicated sealant can be one of the cheapest steps in the entire restoration process, and it may be the step that prevents the work from needing to be repeated prematurely.
5. Use a Drill-Mounted Foam Pad Instead of Hand Polishing
Sometimes the problem is not the polishing compound. It is the amount of consistent movement you can generate by hand.
A small foam polishing pad attached to a standard household drill can make an inexpensive plastic-polishing job considerably more effective, particularly when the lens has a broad, evenly oxidized surface.
This is not the same as simply holding a cloth against the lens while running the drill. The pad needs to be designed for polishing, and the compound needs to be appropriate for plastic.
3M specifically offers headlight restoration systems designed to work with a common household drill. Its restoration process uses small abrasive discs and polishing stages to remove yellowing, oxidation, and surface buildup from plastic lenses.
The useful trick is to keep the drill moving. Holding a spinning pad in one location can generate unnecessary heat and create an uneven finish. Work across a small section, use light pressure, and make overlapping passes. The objective is controlled correction, not maximum speed.
A low-speed setting is preferable to immediately running the drill at its highest setting. Keep checking the lens between passes. If the haze is disappearing evenly, continue. If one area becomes noticeably warmer or clearer than its surroundings, stop and redistribute the work.
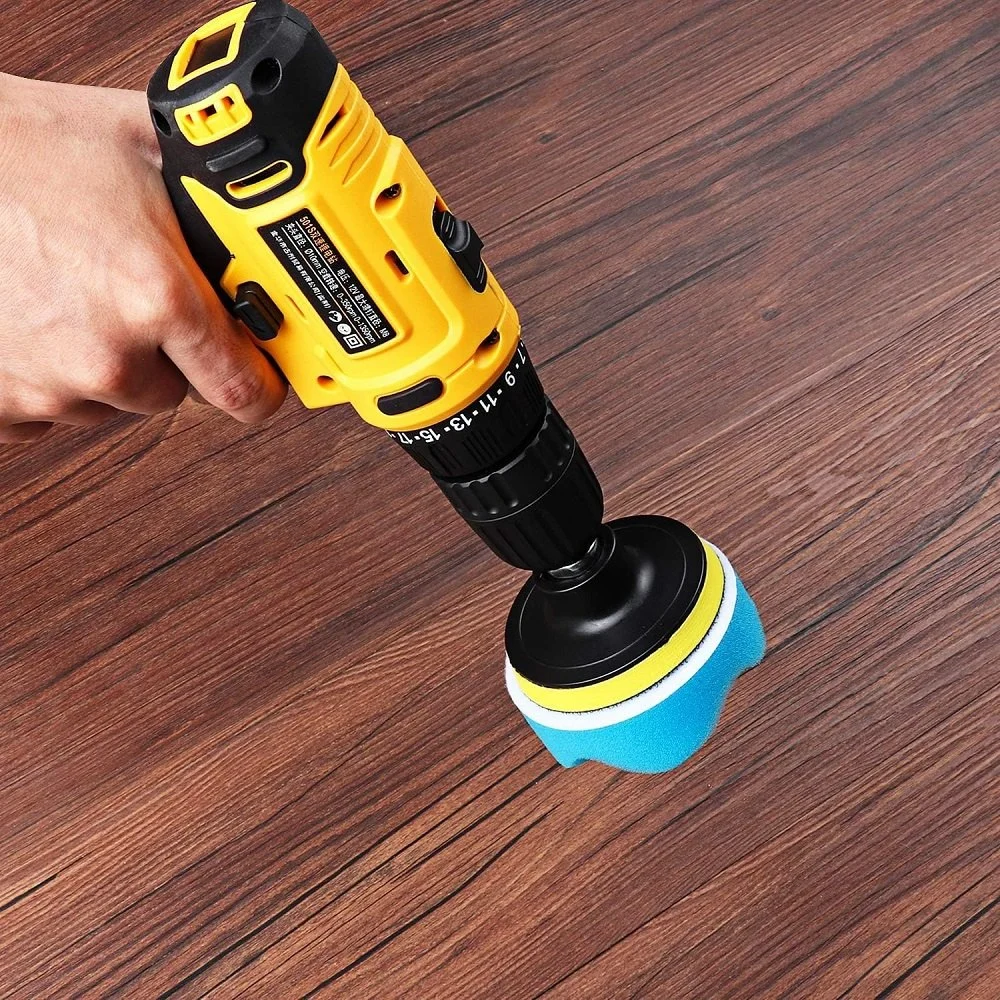
This method is particularly useful for people who have already purchased a suitable plastic polish. Instead of buying another restoration chemical, a small foam pad can turn an existing drill into a polishing tool while keeping the additional expense under $20.
The technique also makes sense for larger headlights because hand polishing a broad lens can require considerable repetition. The machine does not eliminate the need for careful preparation, but it makes the mechanical portion more consistent.
6. Try a Ceramic Headlight Restoration Kit Under $20
A ceramic restoration kit is an interesting alternative when you want the correction and protective coating handled as one system. Instead of buying sandpaper, polish, and a separate sealant individually, a product such as the Cerakote Ceramic Headlight Restoration Kit combines surface preparation with a ceramic protective step.
As of September 2026, Cerakote lists its headlight kit at $17.95, below the $20 target. A U.S. retailer also lists the same product at $17.99. The manufacturer says the kit is designed for two headlights and requires no power tools.
What makes this approach different is the final protection. Cerakote says its ceramic technology chemically bonds to the headlight surface and provides UV protection. That means the kit is not simply trying to make the plastic look clearer for a short period. It is designed as a restoration-plus-protection process.
The preparation still determines the quality of the result. Dirt and loose contamination have to be removed before correction begins, and the surface must be properly prepared before the final coating is applied. A coating cannot compensate for oxidation that was never removed.
The price also makes this option unusual. Many complete restoration systems cost more than $20, but this particular kit currently falls within the budget. Prices can change by retailer, so the $20 threshold should be treated as a current price target rather than a permanent guarantee.
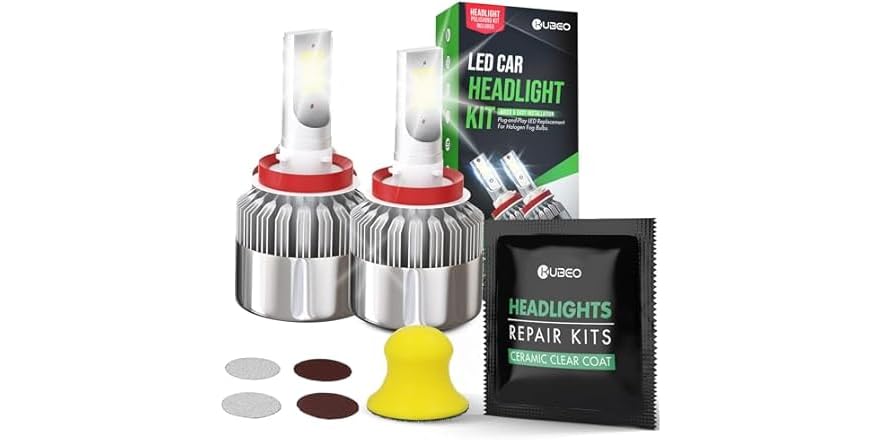
This is especially appealing for someone who does not own a drill or wants to avoid assembling several separate products. The manufacturer specifically states that no power tools are required.
There is also a practical advantage. The kit follows a defined sequence, which reduces the guesswork involved in combining unrelated products.
7. Decontaminate the Lens Before Polishing
A surprisingly useful step is to remove bonded road contamination before touching the cloudy plastic with an abrasive. Headlights do not only collect ordinary dirt. They can accumulate tiny deposits from road film, insects, tree sap, overspray, and other contaminants that washing alone may leave behind.
A detailing clay bar can remove those bonded contaminants from plastic surfaces. Meguiar’s professional detailing clay, for example, is specifically described as safe for plastic and intended to remove bonded contaminants such as overspray, bug debris, water spots, tar, and tree sap when used with appropriate lubrication.
The reason this matters is straightforward. Polishing works best when the abrasive contacts the plastic directly rather than dragging embedded contamination across the surface. This is especially important when a headlight looks cloudy but still feels rough to the touch after washing.
Start by thoroughly washing the headlight. Keep the surface wet with a suitable clay lubricant and gently move the clay across the lens. Do not press hard. The objective is contamination removal, not sanding.
Afterward, rinse or wipe the lens clean and inspect it again. You may discover that some of the apparent haze was actually surface contamination. If genuine oxidation remains, follow with a plastic polish.
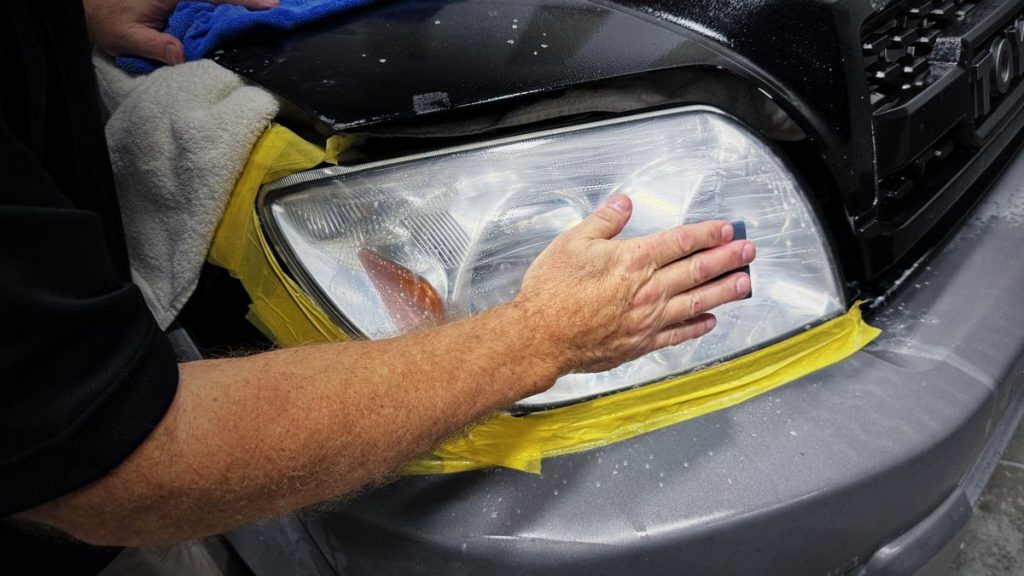
This method is particularly attractive because the clay can be used on other exterior surfaces too, making it less of a single-purpose purchase. It also avoids the common mistake of immediately reaching for coarse sandpaper when the lens has not even been properly decontaminated.
Clay will not remove deep oxidation or repair damaged polycarbonate. It is a preparation step. Its value is in giving the subsequent polishing process a cleaner surface to work against.
For lightly contaminated lenses, that distinction can save unnecessary abrasion and make the final polishing stage faster and more uniform.
8. Use a Fine Plastic Compound After the Cloudiness Is Reduced
There is a point where repeatedly attacking a headlight with coarse abrasives becomes counterproductive. If the lens has already been corrected and only a thin veil of haze remains, switching to a fine plastic compound can produce a cleaner finish without continuing to remove material unnecessarily.
Meguiar’s PlastX is one example of a product formulated specifically for clear plastic. The company says its microscopic diminishing abrasive technology addresses light oxidation, cloudiness, yellowing, and light surface scratches on uncoated plastics, including headlights.
The useful technique here is not to treat the compound as a replacement for sanding when sanding is actually required. Instead, use it as the refinement stage. If a lens has already been wet-sanded and looks uniformly dull, a plastic compound can remove the fine abrasive marks and bring back optical clarity.
Meguiar’s own restoration procedure demonstrates this sequence. Its instructions call for sanding first, followed by PlastX polishing until the remaining scratches are removed and the lens becomes clear.
For a small lens, hand application is perfectly practical. Use a soft foam or microfiber applicator, work a manageable area, and make overlapping passes. Meguiar’s technical guidance says PlastX can be applied by hand and recommends repeating the process when necessary.
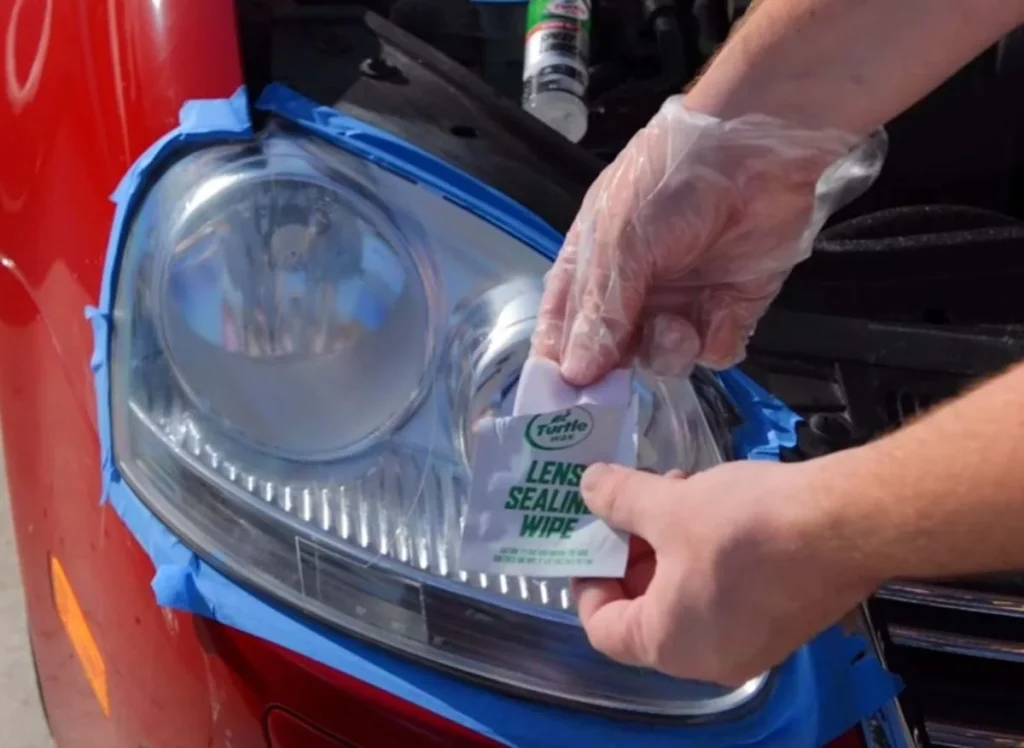
The important warning is heat. If a machine is used, the pad should remain moving, and the plastic should not be allowed to become excessively hot. Excessive heat can damage or distort plastic.
A small bottle of plastic compound can therefore be the finishing tool that turns a dull, sanded lens into a genuinely clear one. It is particularly useful when the major oxidation has already been removed, and the remaining problem is optical refinement rather than heavy material removal.
9. Restore the Lens With a Headlight-Specific Coating Wipe
A coating wipe can be one of the more useful under-$20 options when the headlight has already been sanded and polished but needs a proper protective finish. The key is choosing a product specifically designed for restored automotive lenses rather than treating any clear spray or household coating as interchangeable.
The reason protection matters is rooted in how modern headlamp lenses are constructed. NHTSA notes that plastic headlamp lenses can degrade with age and exposure, while 3M’s restoration documentation explains that restoring a deteriorated lens removes the damaged outer material and can leave the plastic vulnerable to renewed UV degradation.
That makes the final wipe more than a cosmetic step. Products such as 3M’s Headlight Restoration Clear Coat Wipes are designed specifically for this purpose. The manufacturer describes the wipe as a clear protective coating intended for restored plastic headlight lenses and says it provides UV resistance after the damaged surface has been corrected.
Application needs discipline. The lens should be completely clean and dry, with no polishing residue remaining. Tape around the headlight can protect nearby painted surfaces. Apply the coating evenly according to the manufacturer’s instructions and avoid repeatedly going back over areas that have already begun setting.
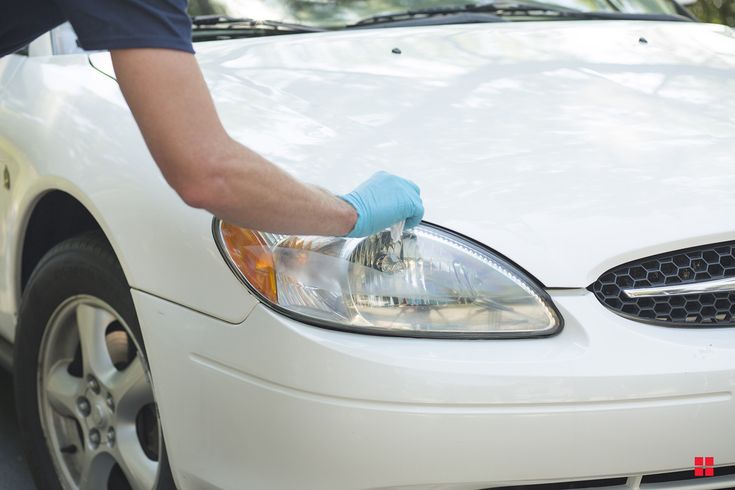
This approach becomes especially sensible after a budget sanding job. Spending $10 or $15 on abrasive paper and then leaving freshly corrected plastic exposed defeats part of the purpose of the restoration.
A coating wipe cannot make a deeply scratched or heavily oxidized lens clear by itself. It belongs at the end of the process. Think of it as the protective layer that preserves the work performed by the earlier abrasive stages.
For someone trying to stay under $20, this can be a smart finishing purchase when the lens already has good clarity but lacks durable UV protection.
10. Use a Two-Stage Compound-and-Polish System
A two-stage correction can be surprisingly effective when a headlight is too damaged for a light polish but does not justify aggressive sanding. The concept is straightforward: use one product capable of correcting the visible defects, then follow with a finer polish that concentrates on clarity and finish.
The distinction is important because a single abrasive product has to compromise between cutting power and finishing ability. A stronger compound can remove more oxidation and surface damage, but it may leave microscopic marks that require refinement. A finishing polish is less aggressive, but that makes it better suited to eliminating those remaining marks.
3M’s Perfect-It system illustrates this professional approach. Its automotive compounds and polishes are designed as progressive stages, with different products intended for different levels of surface correction and finishing.
For a budget restoration, the principle can be adapted without purchasing an entire professional detailing setup. A small plastic-safe correction compound can handle the first stage, while a dedicated plastic polish can provide the second.
The lens should be washed before starting, and the applicator should remain clean. Work in small sections rather than spreading compound over the entire assembly and allowing it to dry. That makes it easier to judge progress and prevents the operator from continuing to abrade an area that is already sufficiently clear.
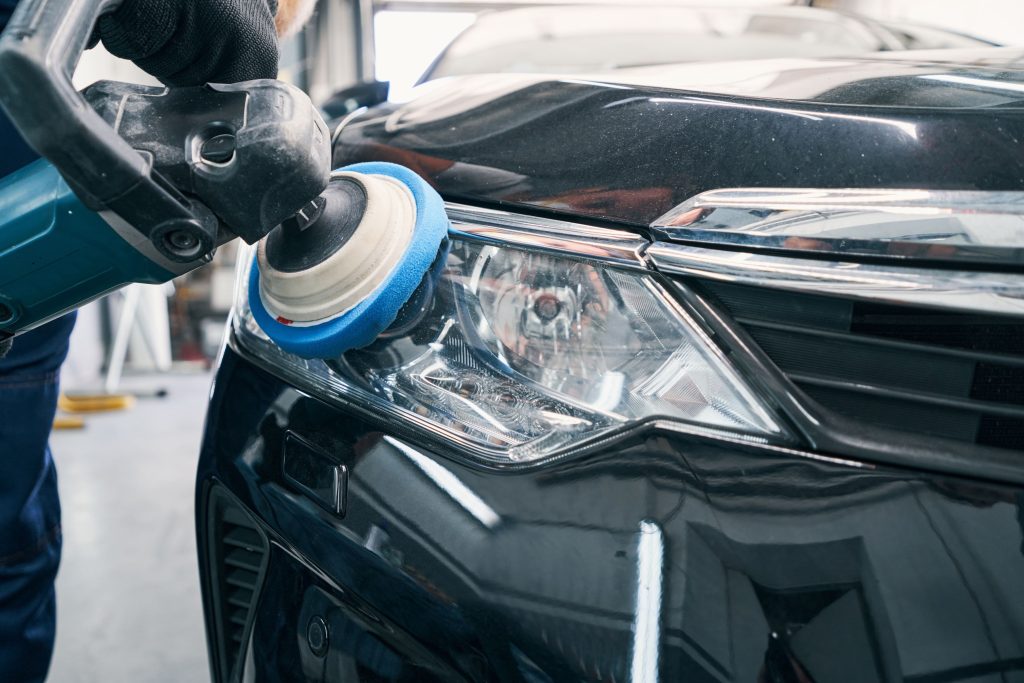
There is also a useful stopping point. If the lens becomes transparent and the remaining imperfections are deep cracks or internal damage, additional polishing is unlikely to solve them. Continuing to compound simply because a mark remains can remove more material without addressing the actual problem.
The final stage should be followed by a UV-resistant headlight coating or sealant. This restores protection after surface correction and helps slow renewed oxidation.
A carefully chosen two-product combination can therefore stay near the $20 threshold while providing a more controlled result than relying on a single aggressive household cleaner.