Most Ford Explorer owners get through the initial delivery walkaround, learn the basics, and spend the next several years driving a vehicle that is quietly more capable than they ever realized. Dealers rarely spend more than fifteen minutes walking through the important settings, and the owner’s manual covers these features in dry, technical language that makes even genuinely useful features feel like optional reading.
The result is an SUV full of underused tools sitting dormant while owners develop workarounds for problems the vehicle has already solved. Families returning to a hot Explorer in a summer parking lot, parents wrestling with second-row seats while holding a car seat, and drivers cautiously reversing out of unfamiliar spaces are all using fewer vehicles than they paid for.
Some of these features require digging into a settings menu. Others are physical mechanisms hiding in plain sight on the seat itself. A few require nothing more than knowing a specific button sequence on your key fob. This guide covers eight of the most useful hidden features inside the Ford Explorer, where to find each one, and what it actually does during real-world daily use.
1. Remote Window Venting
Any Explorer owner who has returned to their vehicle after several hours parked in direct summer sun understands how punishing the wait for a cooled-down cabin can feel. Sitting in stifling heat while the air conditioning struggles to overcome the thermal buildup inside a closed, dark-interior SUV is one of the more universally unpleasant experiences in modern car ownership. This feature addresses that exact scenario without requiring the driver to set foot inside the vehicle first.
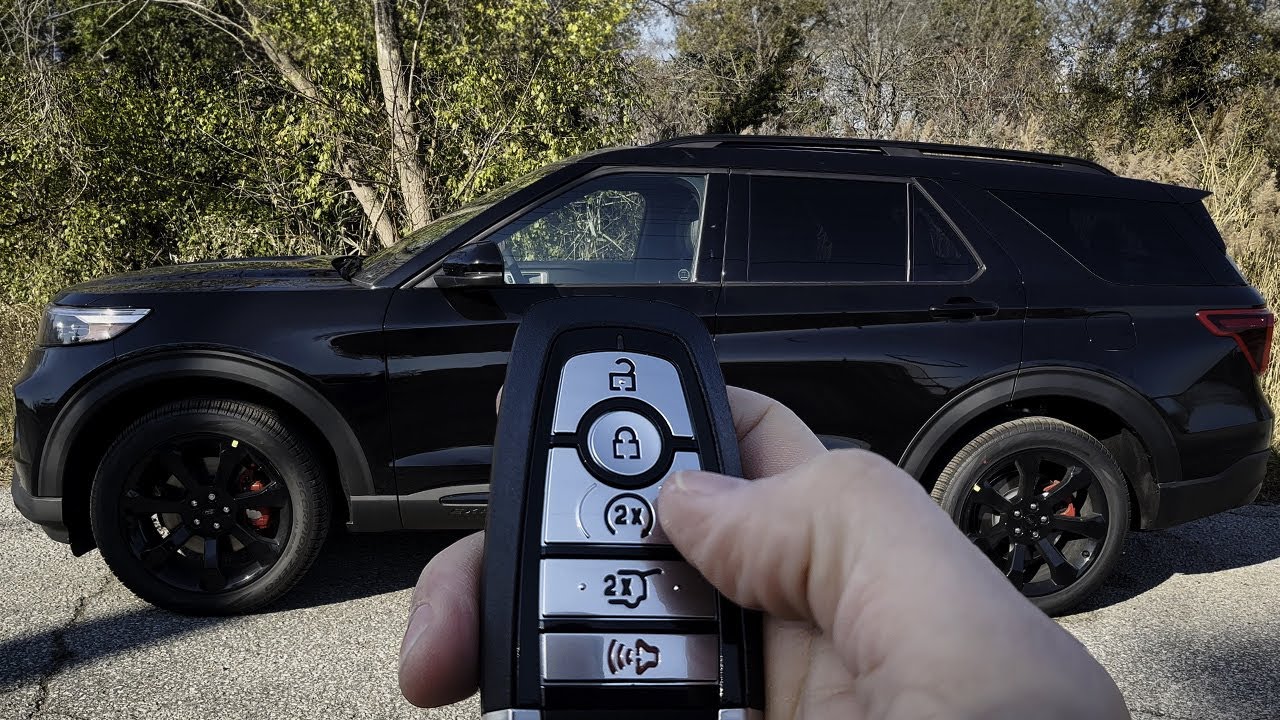
On equipped Explorer models, pressing and holding the unlock button on the key fob lowers the front windows automatically, allowing the trapped hot air that builds up inside a closed cabin during parking to escape before anyone opens a door. This ventilation process begins working from across the parking lot, giving the interior several minutes to exhale heat passively before the driver reaches the vehicle, starts the engine, and runs the air conditioning to cool the remaining interior surfaces.
That head start matters more than it might initially sound. The hottest air in a closed vehicle collects near the headliner and dashboard, and simply opening two windows creates a chimney effect that draws this concentrated heat upward and out before anyone sits down. Air conditioning systems work considerably faster when they are cooling an already-partially-ventilated cabin rather than fighting against a fully sealed heat pocket that has been building since the engine last ran.
Parents who need to buckle children into rear-facing car seats benefit especially from this feature, since the immediate blast of trapped heat that greets a parent opening a rear door becomes considerably less intense after even a minute of window ventilation from across the lot.
Activating this before reaching the vehicle requires only the knowledge that the feature exists and the habit of holding the unlock button rather than simply pressing it briefly.
2. Auto-Lock and Auto-Unlock Settings
Most Explorer drivers experience the vehicle’s locking behavior as a fixed, unchangeable part of how the SUV operates, yet the factory default settings represent only one possible configuration among several that can be adjusted directly through the vehicle settings menu. Understanding what these settings control and how to access them puts the driver in charge of security and convenience behavior that most owners simply accept as predetermined.
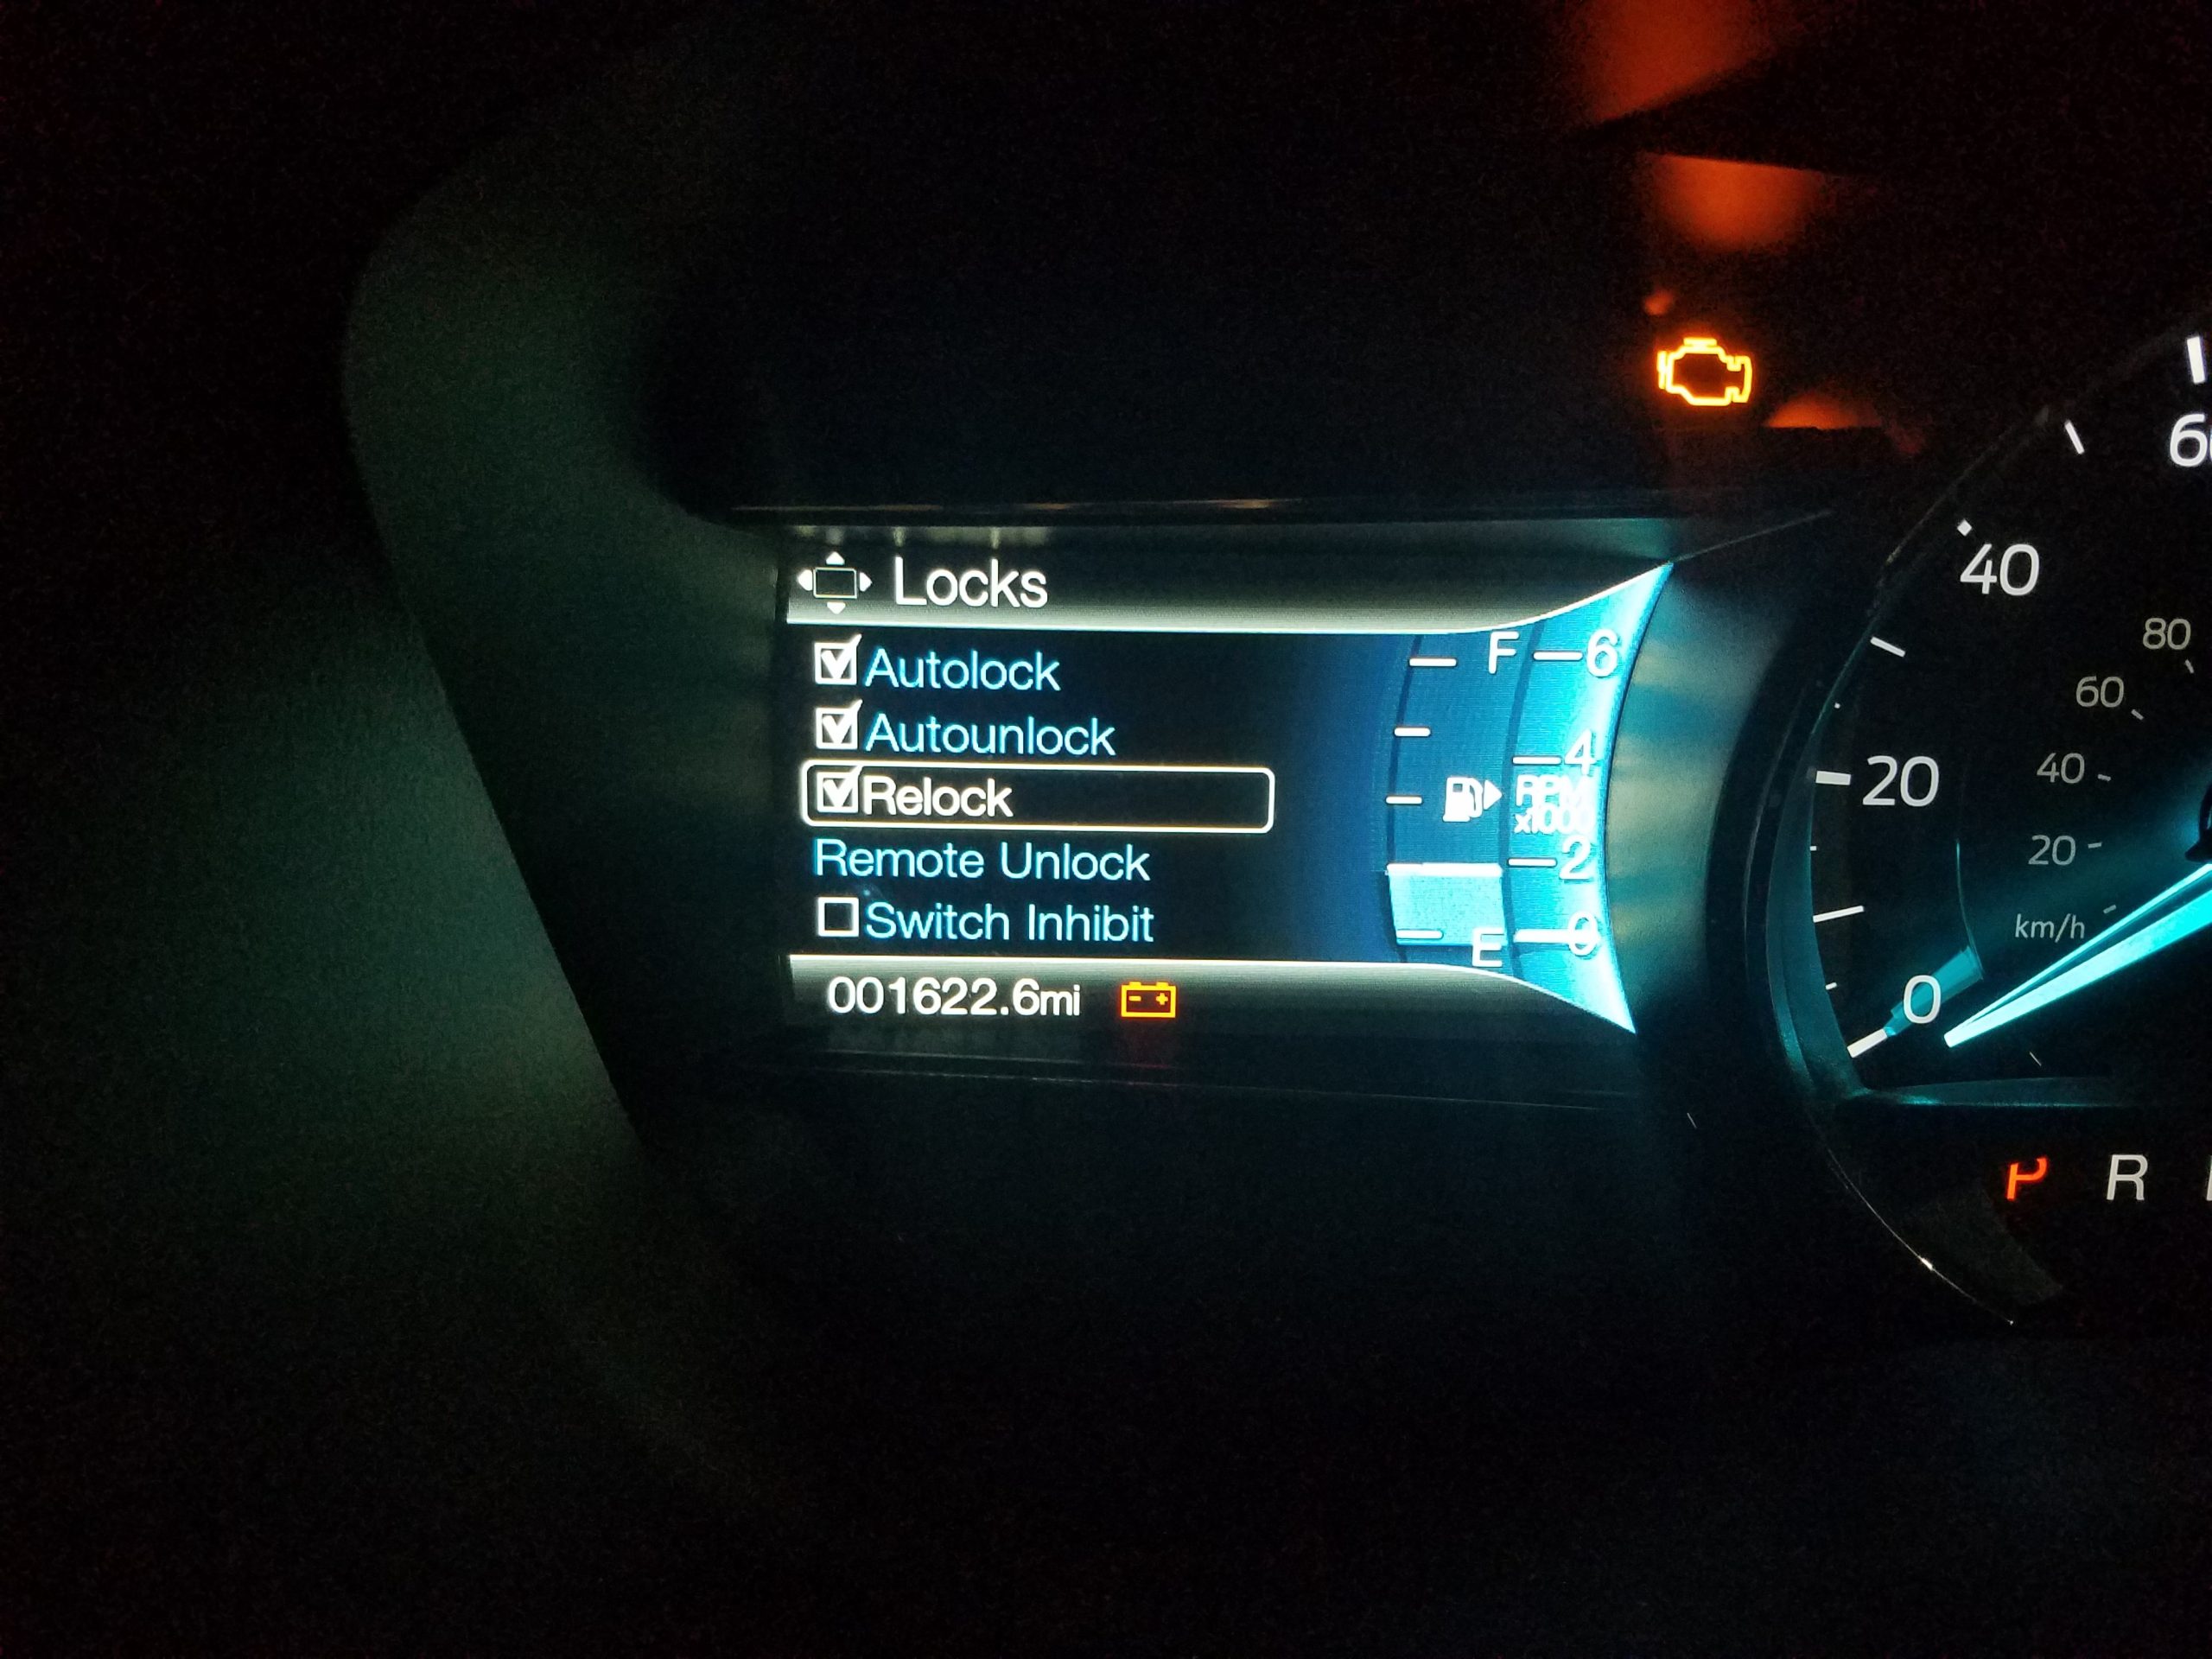
Through the vehicle settings menu, drivers can customize whether the doors automatically lock when driving away and unlock when the ignition is switched off. The auto-lock function that activates as the vehicle begins moving is a security feature designed to prevent doors from being opened at low speeds near intersections, a genuine safety consideration in certain urban environments. Drivers who find this automatic locking behavior useful can confirm it is enabled, while those who prefer manual control of their locking can disable it through the same pathway.
Auto-unlock upon ignition-off similarly divides driver preference along practical lines. Families who frequently exit the vehicle immediately after parking appreciate doors that unlock automatically, eliminating the need to press the unlock button while simultaneously managing bags, groceries, or children. Drivers who prefer keeping the vehicle locked until they are ready to exit, whether for security reasons or simply personal habit, can adjust this default behavior to match their preference.
These settings can be found through the touchscreen by opening the vehicle’s settings menu and selecting the door and lock section, where each function can be enabled or disabled individually. Many owners who access this menu for the first time also discover a variety of additional customization options they did not know existed, making it a useful place to personalize more than just the locking features.
Also Read: 10 Hidden Features in the Chevrolet Traverse
3. Reverse Brake Assist
Modern SUVs often encounter limited rear visibility when backing out of driveways, exiting busy parking garages, or reversing from angled parking spaces. Roof pillars and the cargo area can obstruct pedestrians, cyclists, and smaller vehicles until they are dangerously close. Rearview cameras and rear cross-traffic alerts help drivers recognize these hazards, but they still depend on a quick response. Reverse Brake Assist adds another layer of protection by automatically applying the brakes if it detects an imminent collision and the driver does not react in time.
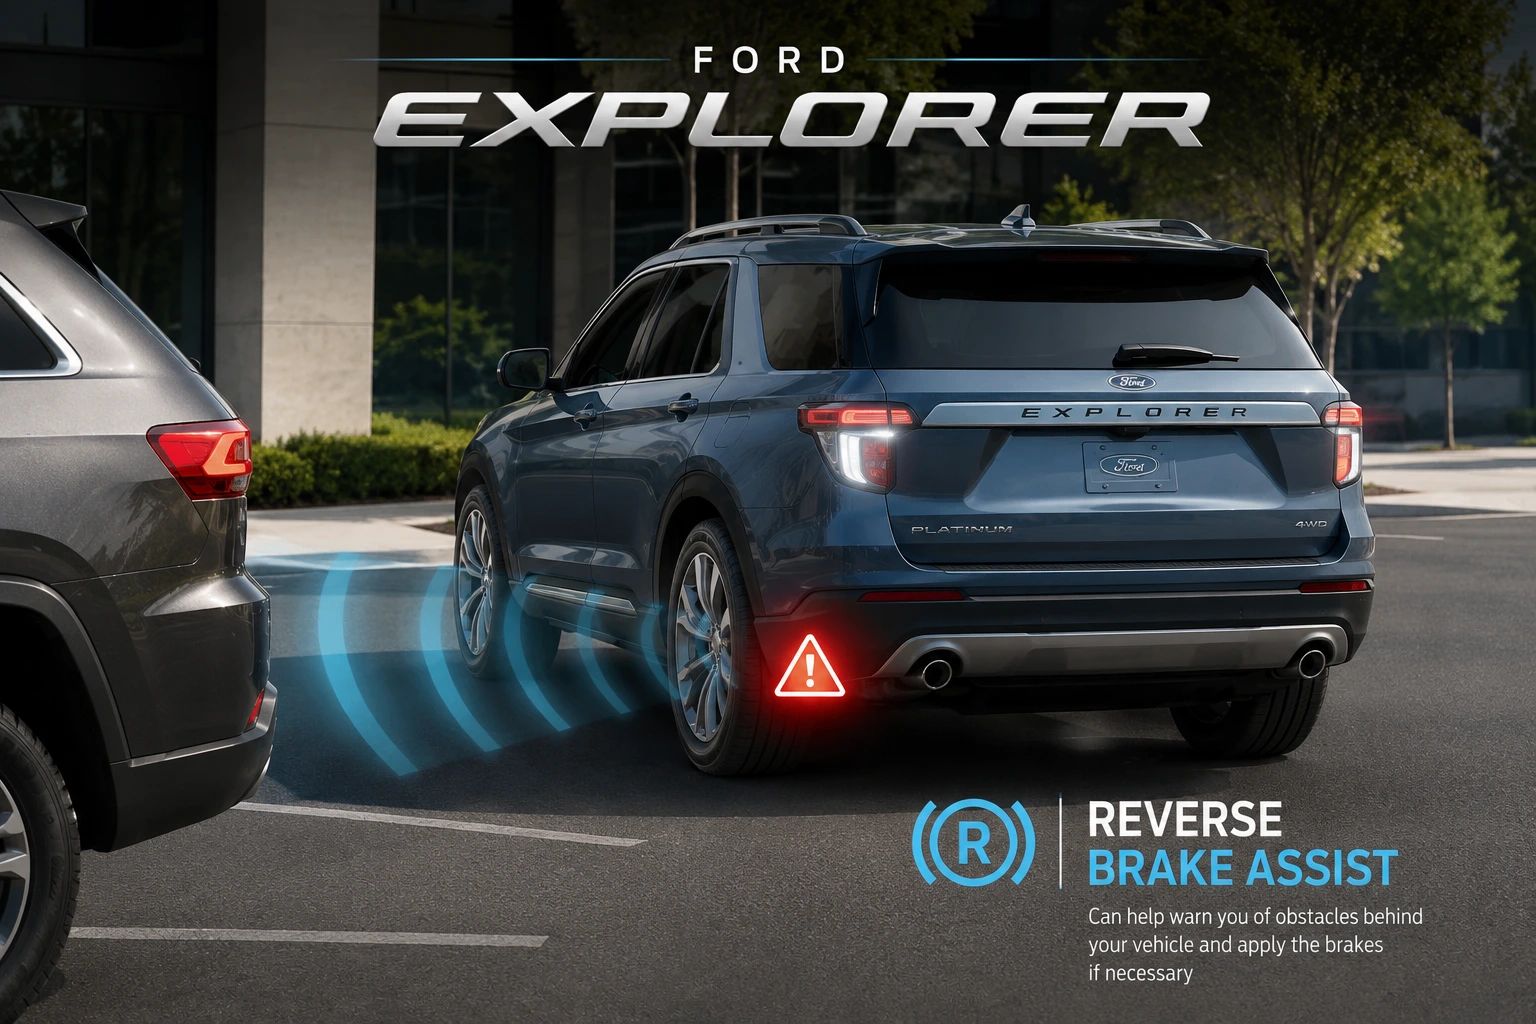
Certain Explorer models equipped with advanced driver assistance technology include a hidden feature that can automatically apply the brakes when it detects a vehicle, object, or pedestrian behind the SUV while reversing. Rather than limiting its response to an audible or visual warning, the system can step in and brake automatically if it determines that a collision is imminent and the driver has not reacted quickly enough.
This automatic intervention addresses the gap between detection and reaction that camera systems and alerts alone cannot close. A driver who glances at the rearview camera, sees a clear path, and begins reversing may not have time to process and react to a pedestrian who walks behind the vehicle during the reverse maneuver before a collision occurs. Reverse Brake Assist monitors for exactly this scenario and applies braking force automatically when the system calculates that a collision is otherwise likely given the current reversing speed and trajectory.
Finding this setting requires entering the driver assistance section of the vehicle settings menu, where it appears as a toggle that can be enabled or confirmed as active. Owners who were unaware this feature existed on their Explorer should check whether it is enabled, since the factory default state may vary depending on trim level and production date.
4. 360-Degree Camera Split Views
The standard rearview camera that most drivers use as their primary parking aid represents only one view among several that the Explorer’s camera system can display simultaneously. Owners who have only ever seen the standard rear camera view while backing up are using a fraction of the parking assistance capability available on equipped models, since the full camera system provides a genuinely useful collection of perspectives that make tight parking situations considerably less stressful.
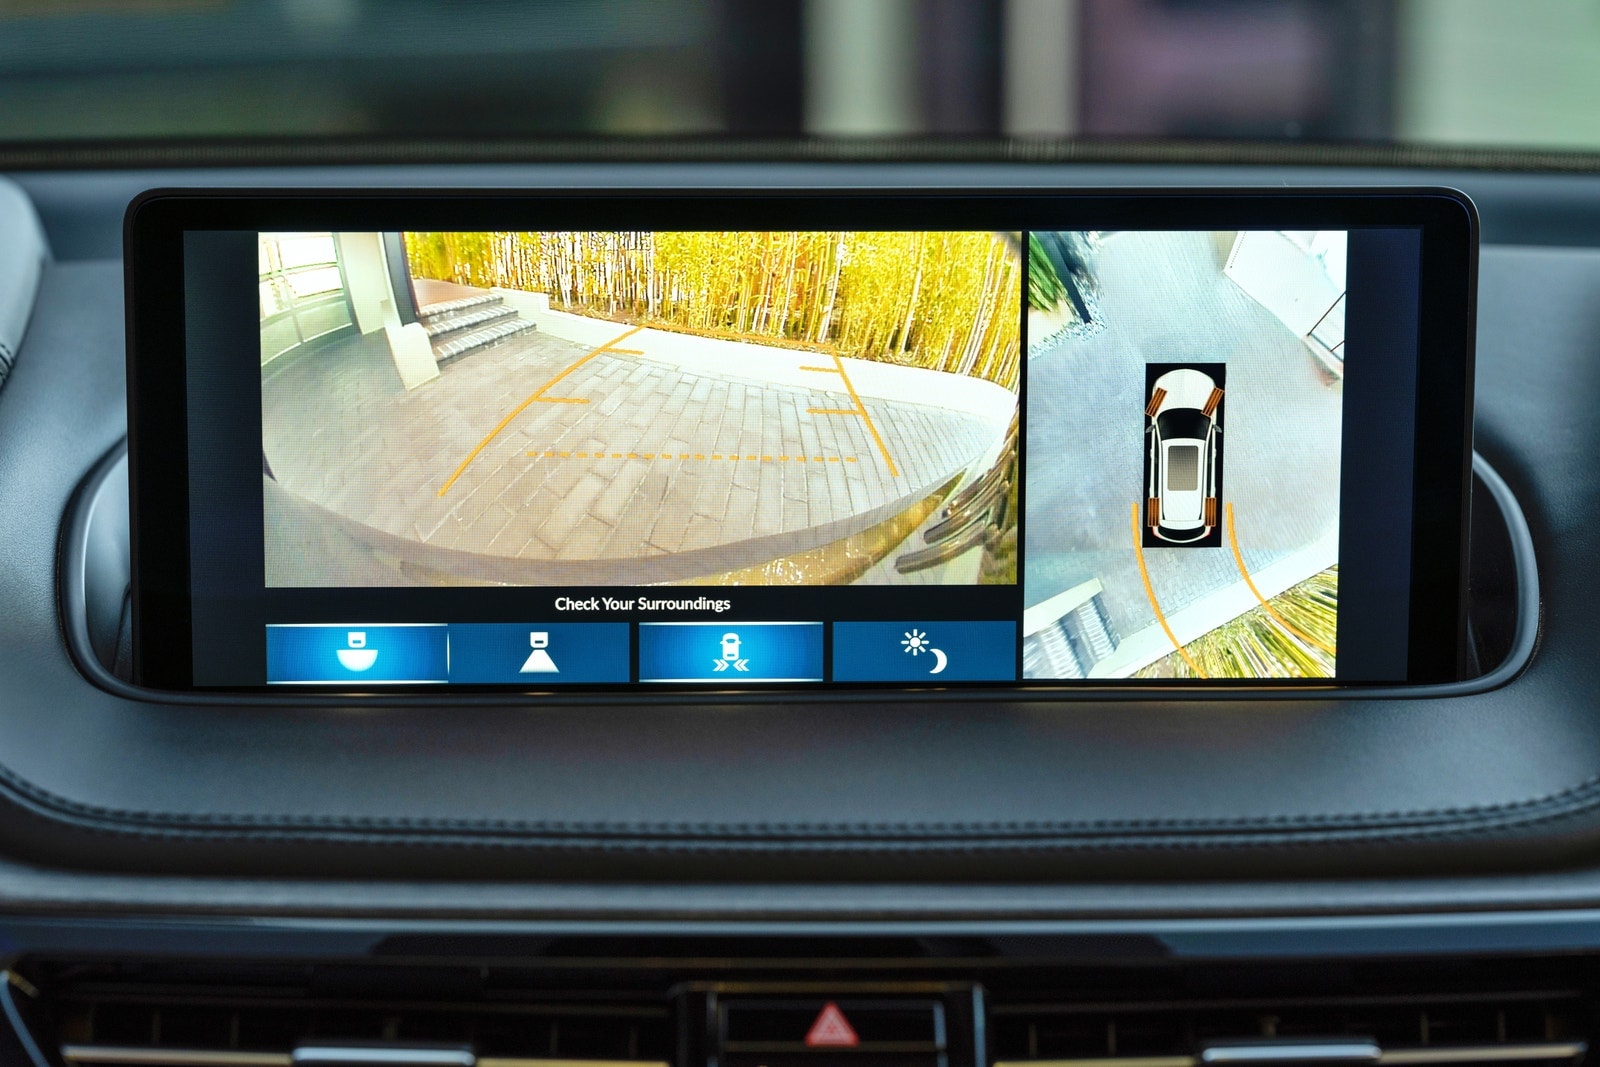
On equipped Explorer models, the touchscreen provides multiple camera angles, including front, rear, and overhead views, making parking and maneuvering in tight spaces much easier. The overhead view, sometimes called a bird’s-eye or surround view depending on the specific software version, stitches together feeds from multiple cameras positioned around the vehicle to create a composite top-down image showing the Explorer’s position relative to surrounding obstacles, curbs, and parked vehicles simultaneously.
This overhead view proves particularly useful in parking situations where the standard rear camera cannot show the full picture, such as parallel parking on a busy street where the relationship between the front bumper and the car ahead matters as much as the gap behind. Switching between available camera angles while parking provides real-time visual information from multiple perspectives simultaneously rather than requiring the driver to make spatial judgments based on a single camera feed.
Accessing these additional views typically involves tapping a camera icon or a switching button on the touchscreen while the standard backup camera is displaying, cycling through the available angles for that equipped model. Drivers who discover this feature frequently report that it transforms their confidence in tight parking situations that previously required multiple correction attempts to complete successfully.
5. Liftgate Height Memory
Anyone who parks regularly in a garage with a ceiling that sits lower than the Explorer’s power liftgate would naturally rise to know the specific frustration of having the liftgate slam into the ceiling, requiring manual intervention to lower it before it causes damage.
Factory liftgate programming typically opens to the vehicle’s maximum height to accommodate the widest range of users, yet for drivers whose garage ceiling restricts that maximum height, the default behavior creates a repeated collision between the liftgate and overhead structure.
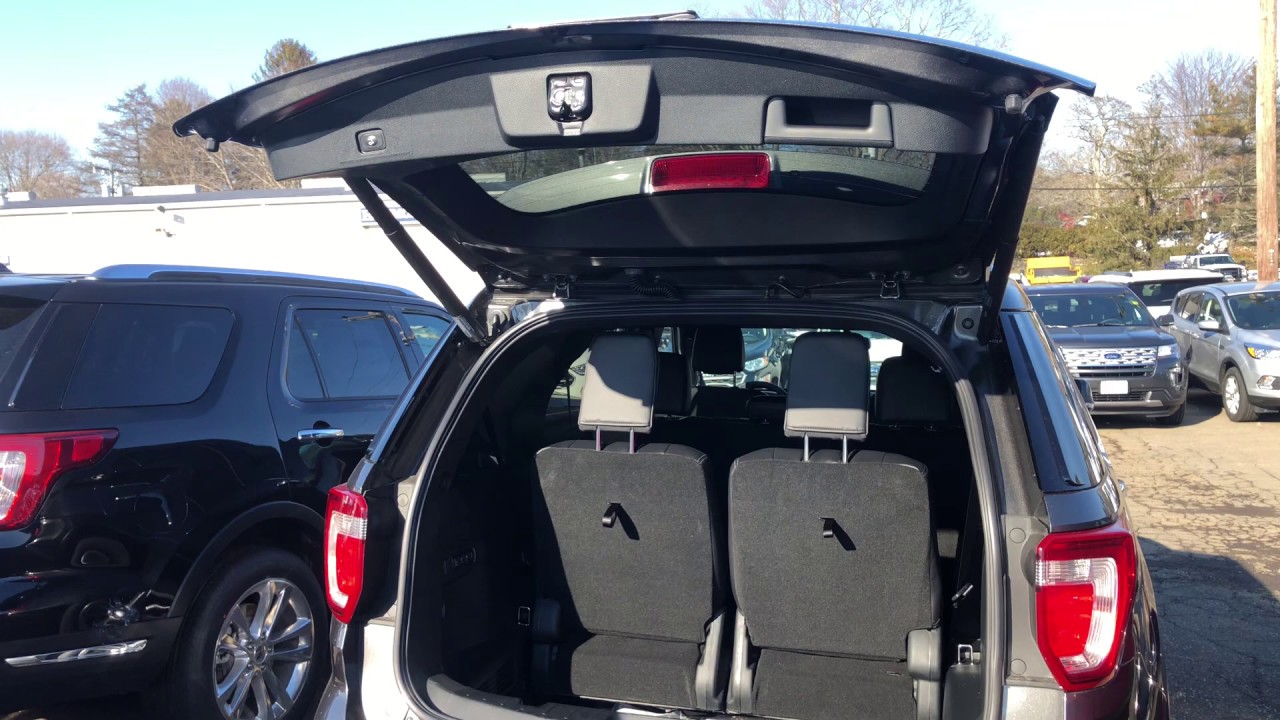
A manual adjustment process solves this problem permanently by programming a custom maximum opening height into the liftgate’s memory that matches the specific clearance available in any given garage or low-overhead environment. You can manually adjust the power liftgate to your preferred height, then press and hold the control button on the hatch until it beeps to program a custom opening limit for low ceilings.
The programming process requires positioning the liftgate at the desired maximum height during the adjustment procedure, which means first raising the liftgate to the height that fits safely beneath the ceiling, then holding the appropriate button until the system confirms the new setting with an audible beep.
After programming, every subsequent power liftgate opening will stop at that custom height automatically rather than continuing to its previous maximum, eliminating the collision risk without requiring manual intervention during each parking session.
This feature extends beyond just garage protection into other scenarios where overhead clearance matters, such as loading in a covered parking structure, under a carport, or beneath a low-hanging tree branch at a regular parking location. Programming the height once provides an ongoing benefit across every future use of the power liftgate in that environment.
6. Configurable Digital Cluster Layouts
Driver information displays in modern vehicles typically show a fixed set of gauges and readouts that engineers determined would serve the broadest range of drivers, yet individual preferences for what information deserves priority during driving vary considerably from person to person.
Drivers who spend most of their time on highways often prioritize different information than those who regularly drive through busy city streets. The Explorer’s digital instrument cluster is designed to accommodate both preferences with a range of customizable displays, though many owners never realize these personalization options are available.
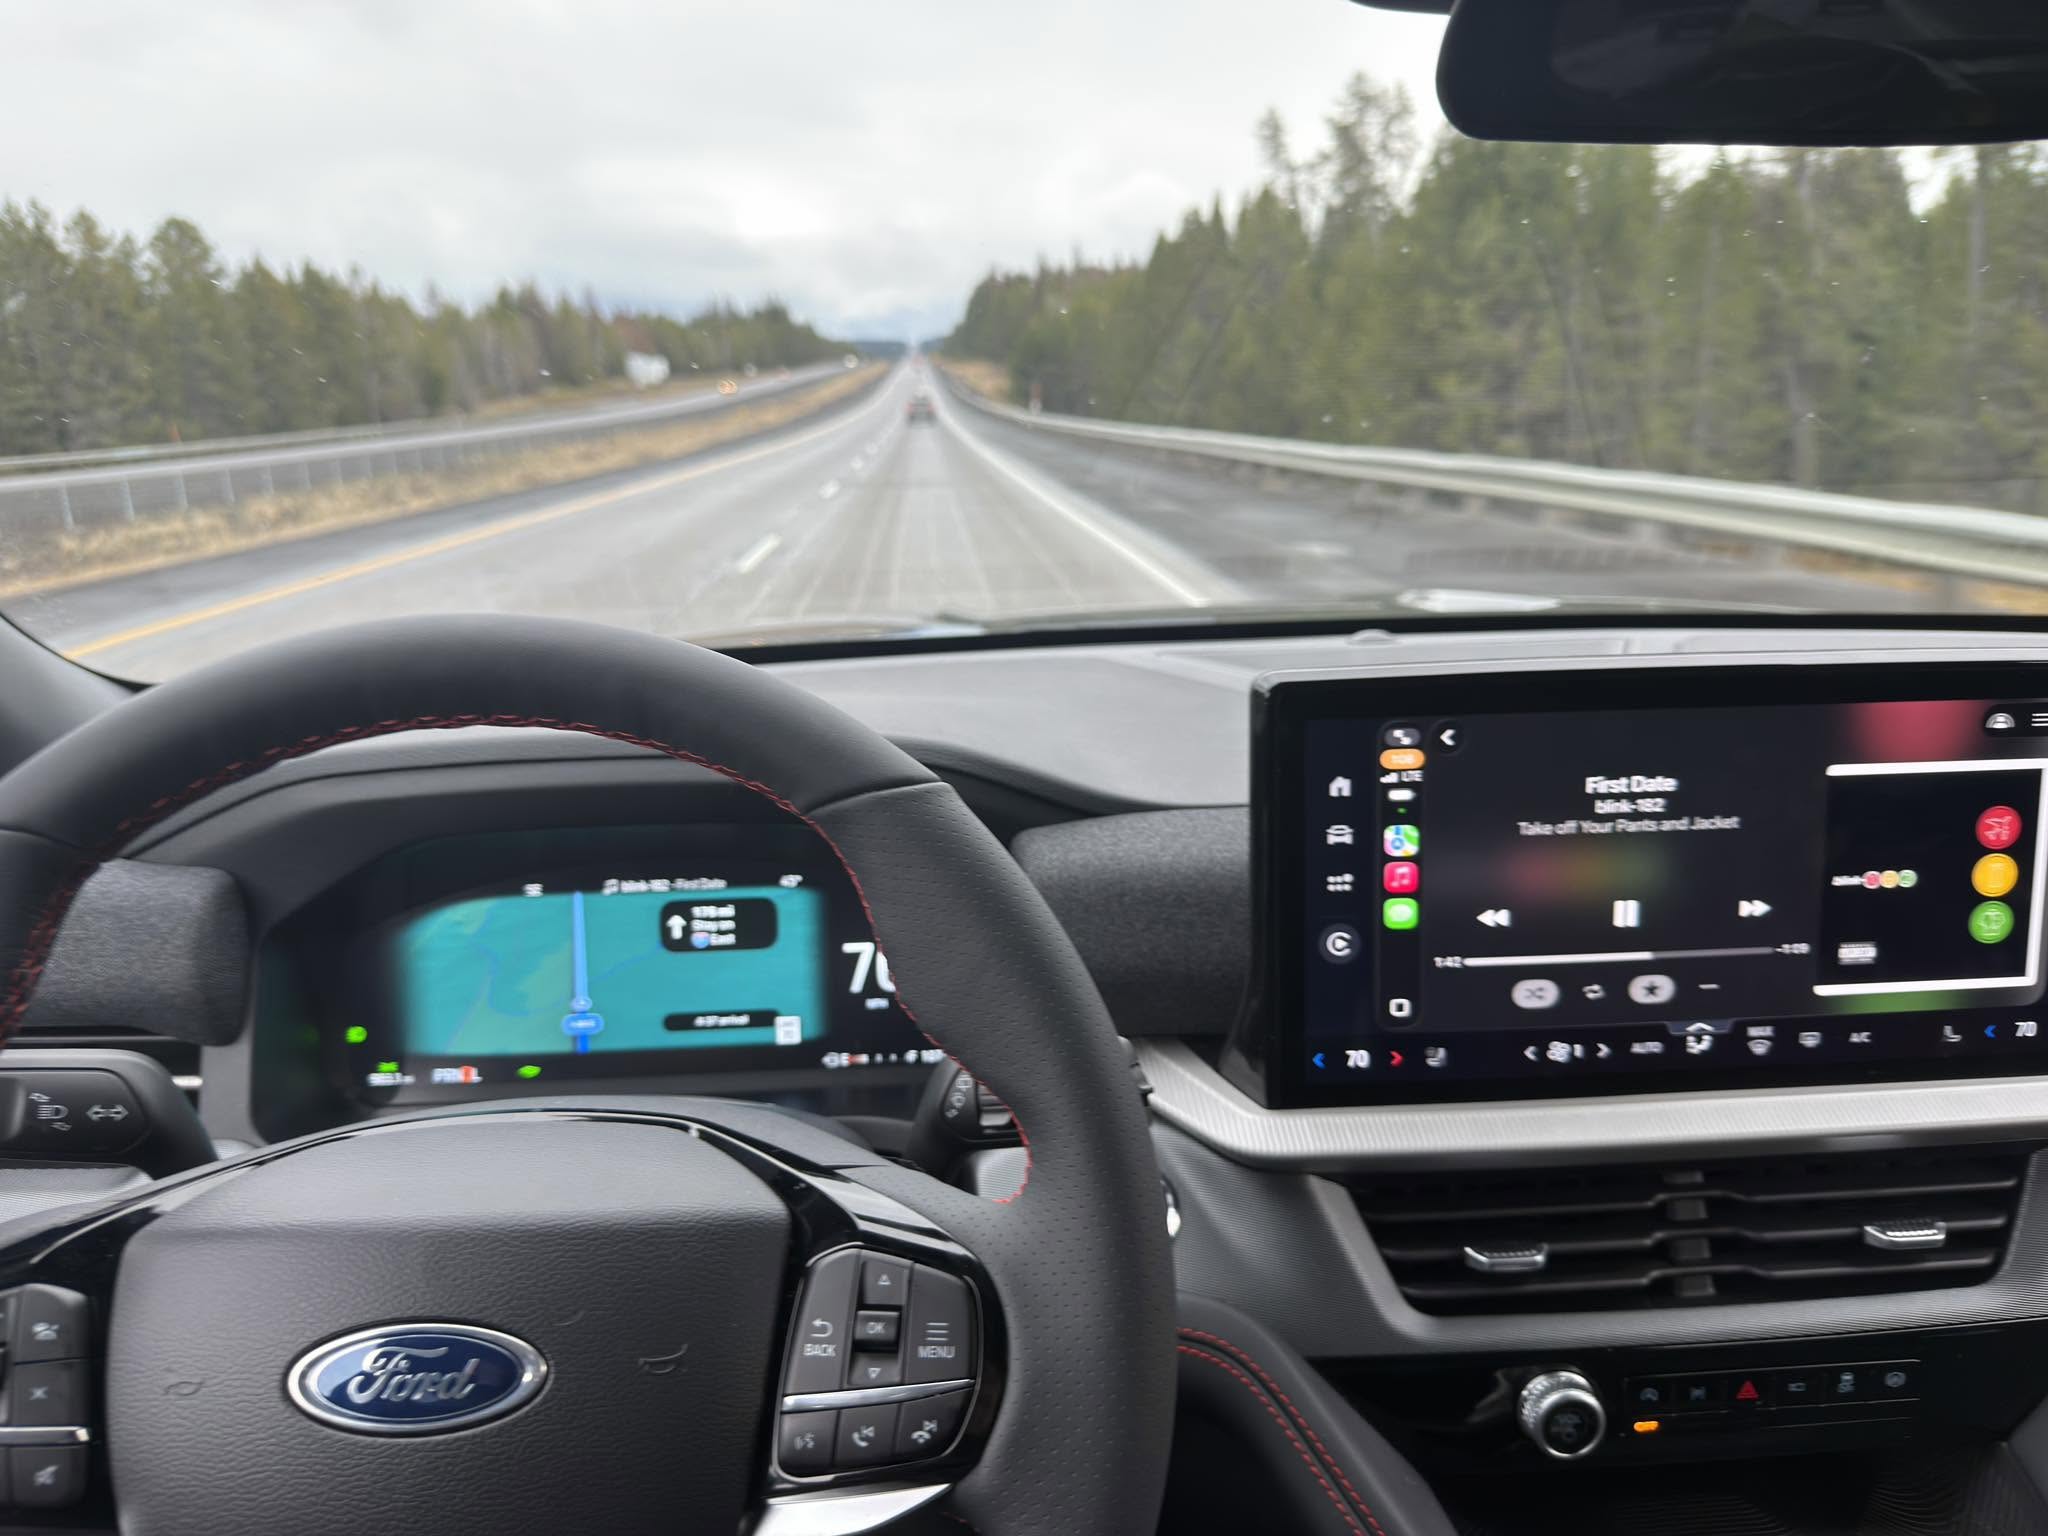
On Explorer models equipped with the digital instrument cluster, drivers can customize the information displayed, including navigation, driver assistance, trip data, and vehicle information. This customization capability allows each driver to configure the instrument cluster around the specific information they reference most frequently rather than accepting the factory layout as permanent.
A driver who relies heavily on turn-by-turn navigation can prioritize the map display within the cluster, keeping navigation information within their natural line of sight without requiring a glance toward the separate center touchscreen. A driver more focused on efficiency can configure the cluster to display fuel economy data and range information prominently. Someone who wants constant awareness of driver assistance system status can arrange those readouts in the most visible position within the digital display.
Accessing cluster customization typically happens through the steering wheel controls or a specific section within the vehicle settings menu, depending on the model year, where available layout options are presented visually before being applied to the cluster.
Families with multiple drivers can each configure the cluster layout to their preference, since the digital display is reconfigurable quickly enough to adjust before any individual drive without significant time investment.
7. Easy Entry Second-Row Function
The practical challenge of accessing a three-row SUV’s third row with any dignity or efficiency is familiar to anyone who has owned a vehicle with this seating configuration. Standard second-row seats require manual folding, lifting, and repositioning that takes enough time and physical effort to become genuinely inconvenient during the repeated back-seat access that family life with multiple children requires across a typical week. The Explorer addresses this with a dedicated mechanism most owners walk past without ever noticing.
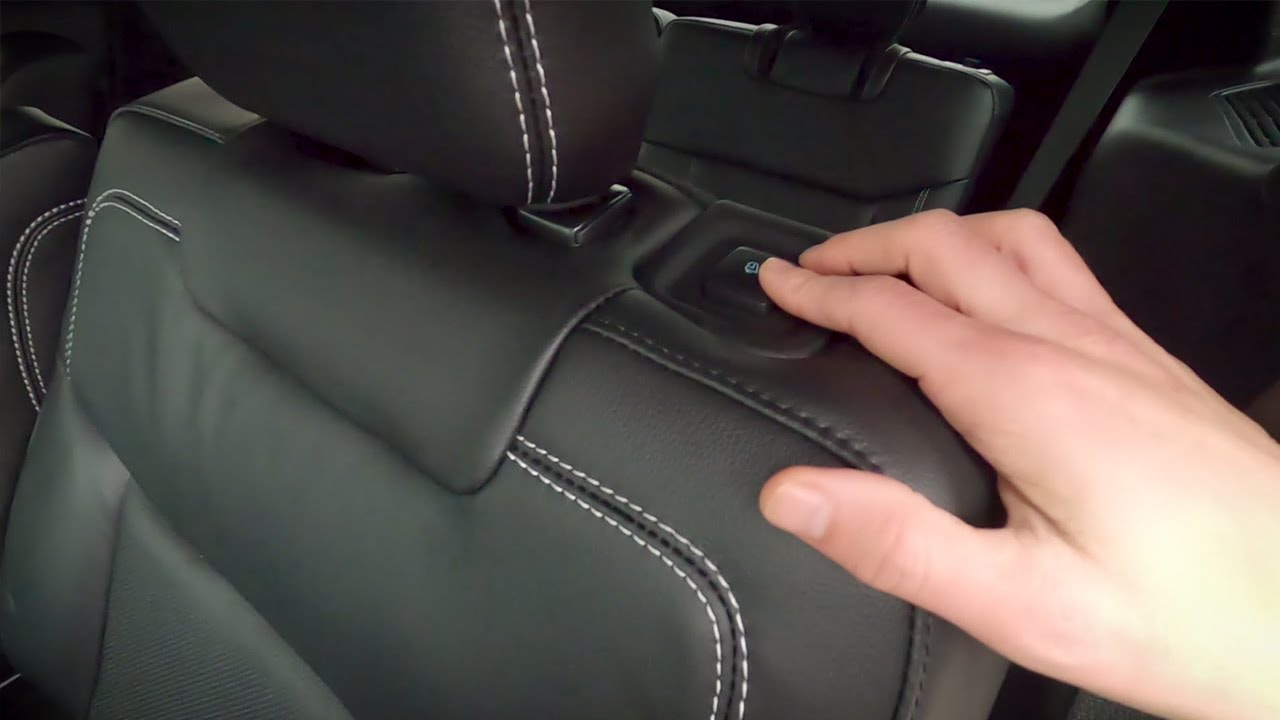
A quick-release mechanical button or lever on the top shoulder of the second-row seats instantly folds the seatback forward and slides the base out of the way for effortless third-row access. This single-motion mechanism does what typically requires several separate manual steps in a single operation, opening the pathway to the third row in the time it takes to press one control rather than the time it takes to fold a seatback, lift a seat base, and push the entire assembly forward.
Discovering this mechanism typically happens by feel as much as by sight, since the button or lever sits at the outer shoulder area of the second-row seat where hands naturally reach when attempting to fold or adjust the seat. Once located, the quick-release function becomes one of those features that owners wonder how they managed without, since the improvement in third-row access speed is immediately obvious during real use with children, bags, or equipment being loaded into the rearmost seating area.
Car seats installed in the second row can make third-row access nearly impossible in some SUVs, and the Explorer’s easy-entry function specifically addresses this by allowing the entire second-row seat to move as a unit even when a car seat is installed, though checking specific car seat installation compatibility before relying on this feature in that configuration is always worthwhile.
Also Read: 8 Hidden Features in the Toyota 4Runner
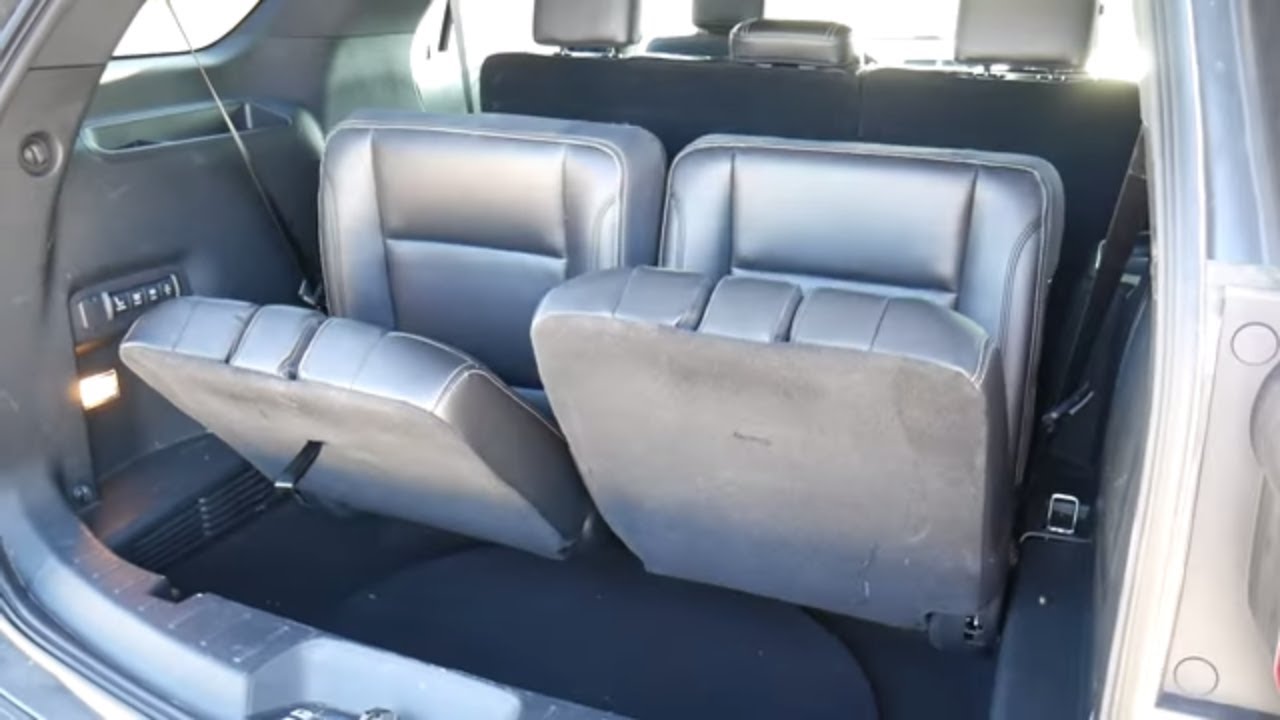
8. PowerFold Third-Row Stowage
Three-row SUVs frequently require owners to physically climb into the cargo area, reach forward with significant effort, and manually fold third-row seatbacks by hand when converting from full passenger capacity to maximum cargo mode. In some vehicles, this process requires removing headrests, unlatching multiple mechanisms, and pushing or pulling seatbacks that resist smooth folding through their own weight. The Explorer eliminates this entire physical process on equipped models through a one-touch automated system positioned at the most logical location possible.
On equipped Explorer models, a panel of one-touch buttons inside the rear cargo area allows drivers to automatically fold down or entirely flatten the third-row seats into the floor when the vehicle is in Park. Standing at the open liftgate and pressing these buttons triggers an automated sequence that folds the specified seat section completely flat without requiring any entry into the vehicle or manual seat manipulation.
The placement of these controls at the cargo opening rather than inside the vehicle reflects genuine thought about when and how this feature gets used in practice. A driver who has just arrived at a hardware store, home improvement warehouse, or furniture pickup location wants to convert from passenger mode to cargo mode while standing at the rear of the vehicle loading area, not while sitting in the driver’s seat or climbing into the cargo bay to reach a seat folding mechanism by hand.
One-touch functionality also matters when hands are occupied with shopping bags, tools, or children, since a single button press requires only one free finger rather than the two-handed engagement that manually folding a second-row seat across a large cargo area typically requires.
Discovering this button panel and the automation it controls typically produces an immediate response of genuine appreciation from Explorer owners who have been manually folding these seats throughout their ownership.